How to access the Honda Beat ECU and main relay
Updated September 2, 2023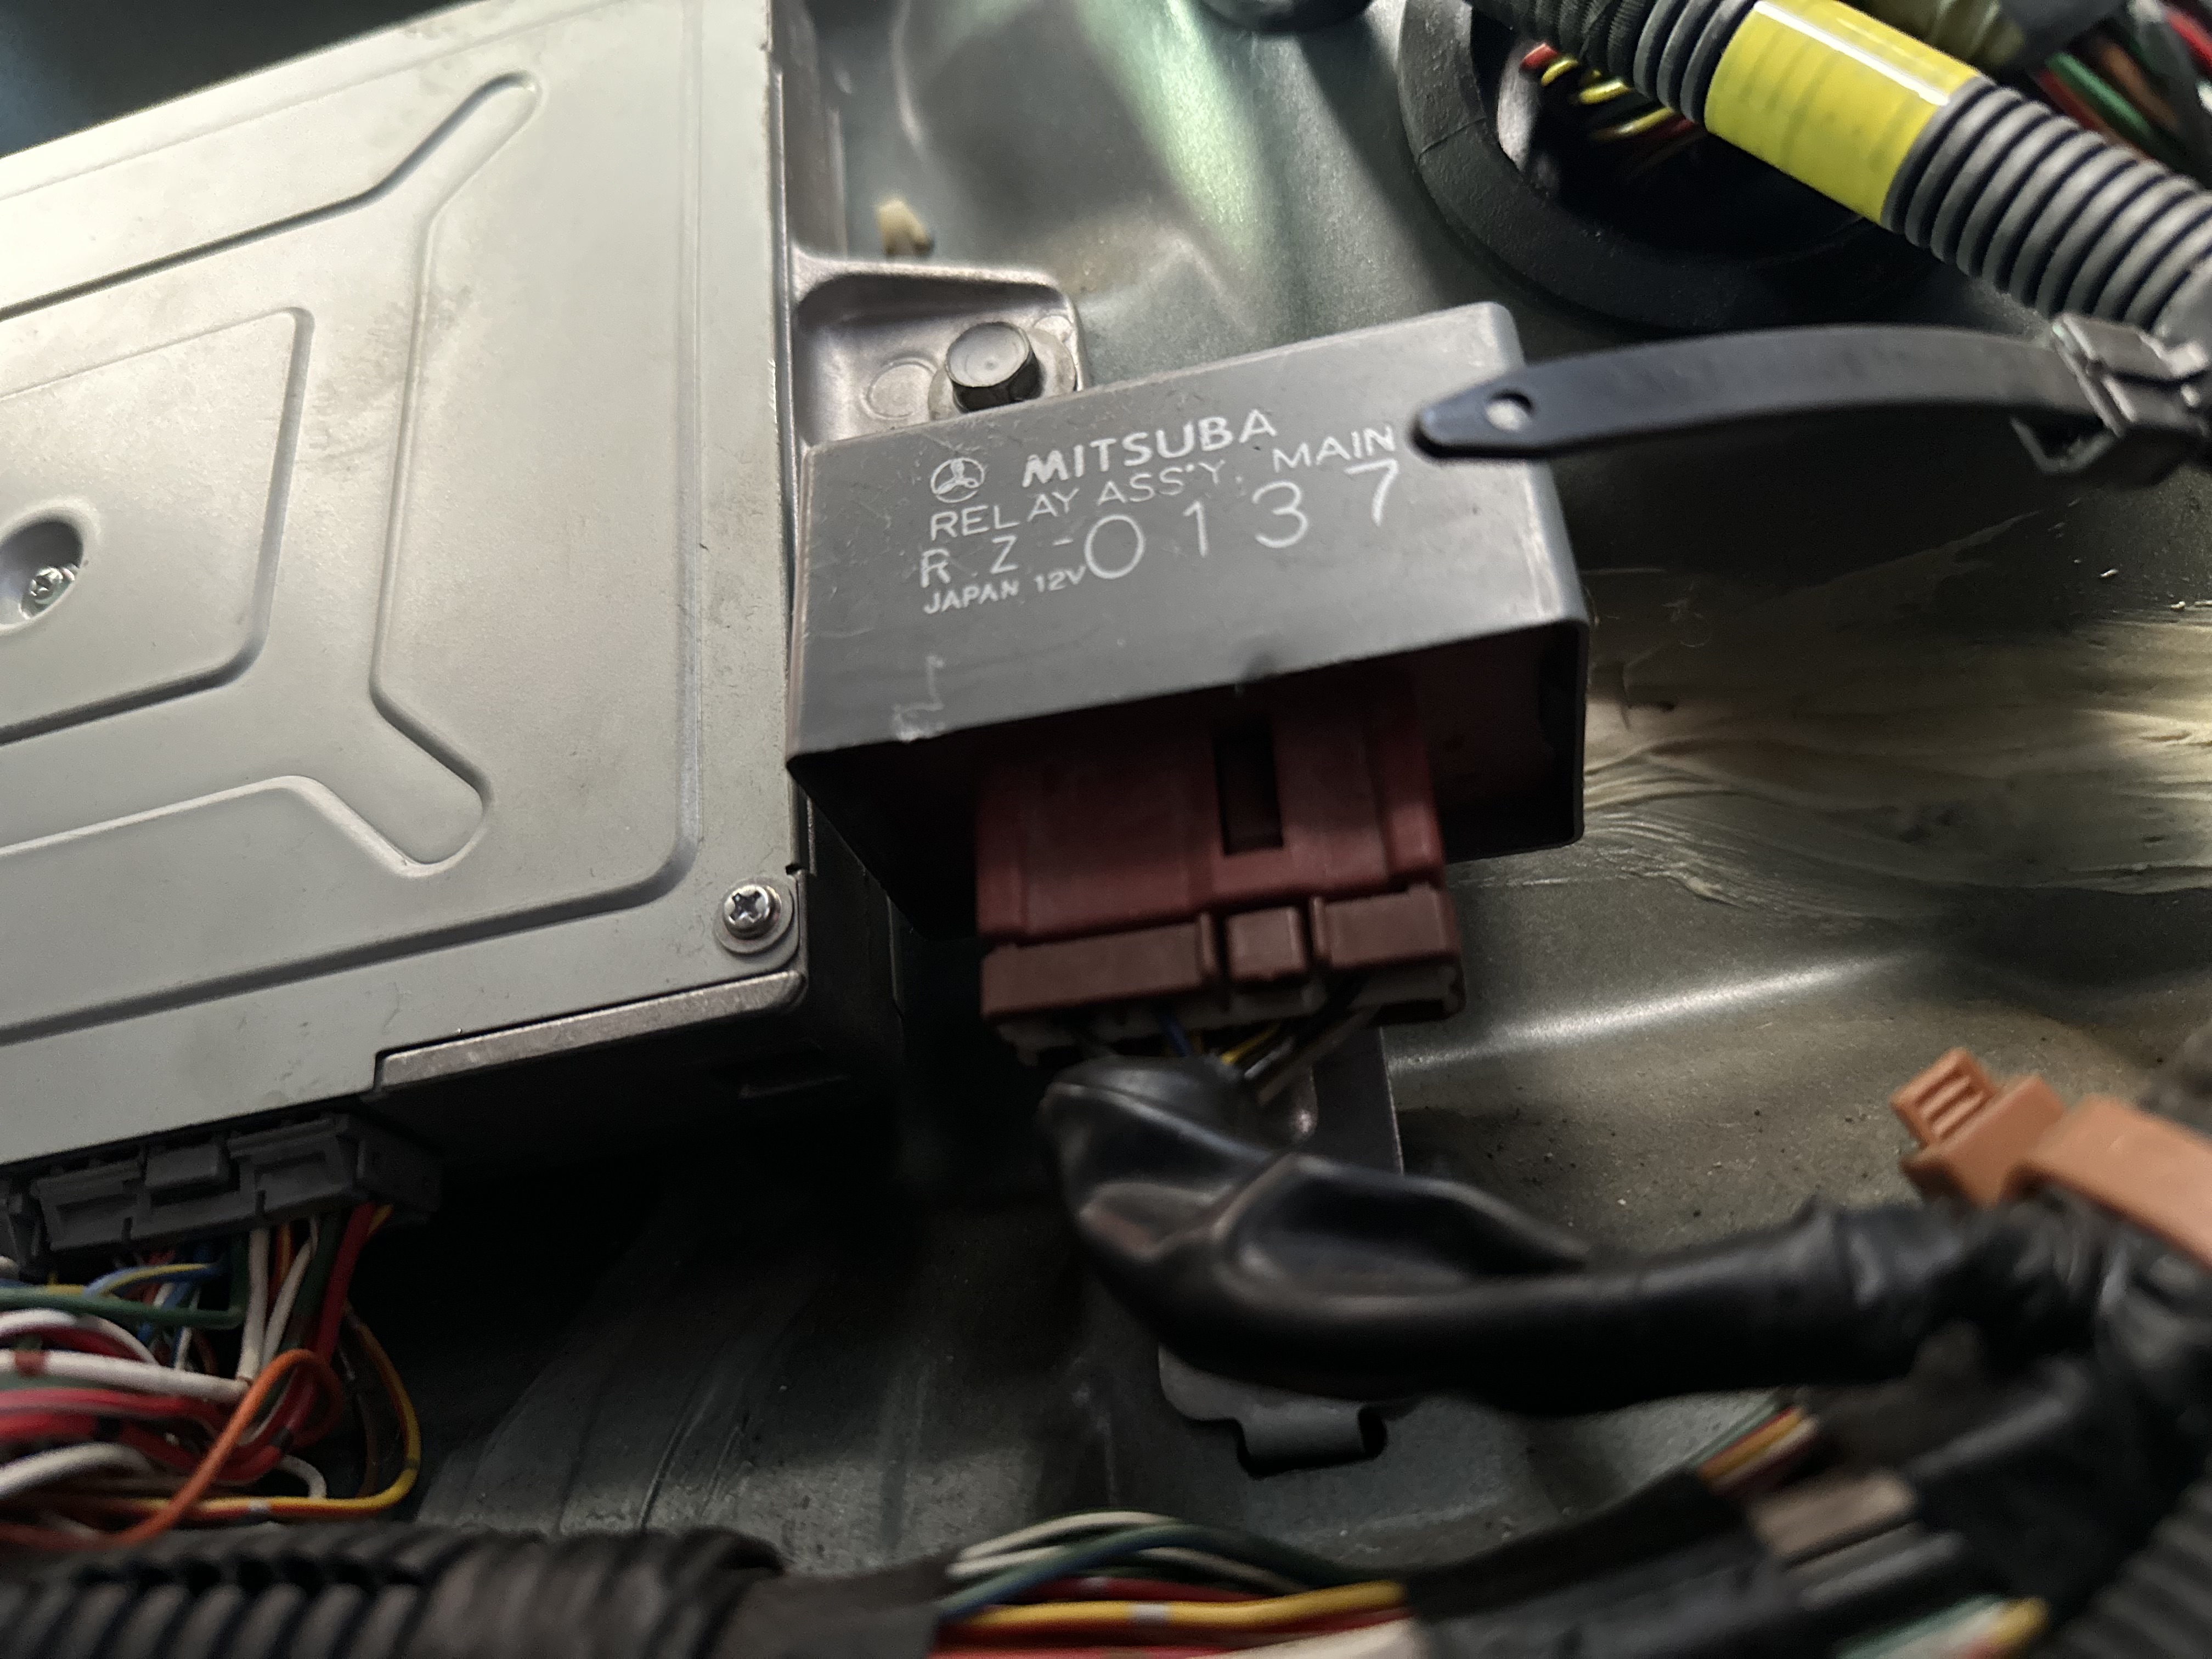
Intro
This guide will walk you through the process of accessing the ECU and main relay in your Honda Beat. These sensitive electronic components are regularly exposed to extreme heat because they’re located close to the engine. Over time, this can lead to failure of one or both. The most common issues are blown capacitors in the ECU or cracked solder joints in the main relay.
If you have trouble starting your Beat when the engine’s warm, it’s probably time to repair or replace the main relay.
You may also want to access the ECU and main relay to do some preventative maintenance, like relocating them under the passenger seat or installing heat shielding.
Accessing the main relay is also useful if you want to install a kill switch to make it somewhat less likely that your Beat will get stolen.
- Stubby JIS 2 screwdriver (A stubby screwdriver will make it easier to remove fasteners behind the passenger seat. Alternatively, you could remove the seat.)
- 10 mm socket
- Plastic pry tools
- 12 mm socket (Optional if you don’t plan to remove the passenger seat.)
Instructions
Step 0: Devise a plan for storing fasteners
You’re going to remove a lot of tiny fasteners before this project is done, and some of them can only be purchased in Japan. Before you start taking things apart, you should come up with a plan for storing them.
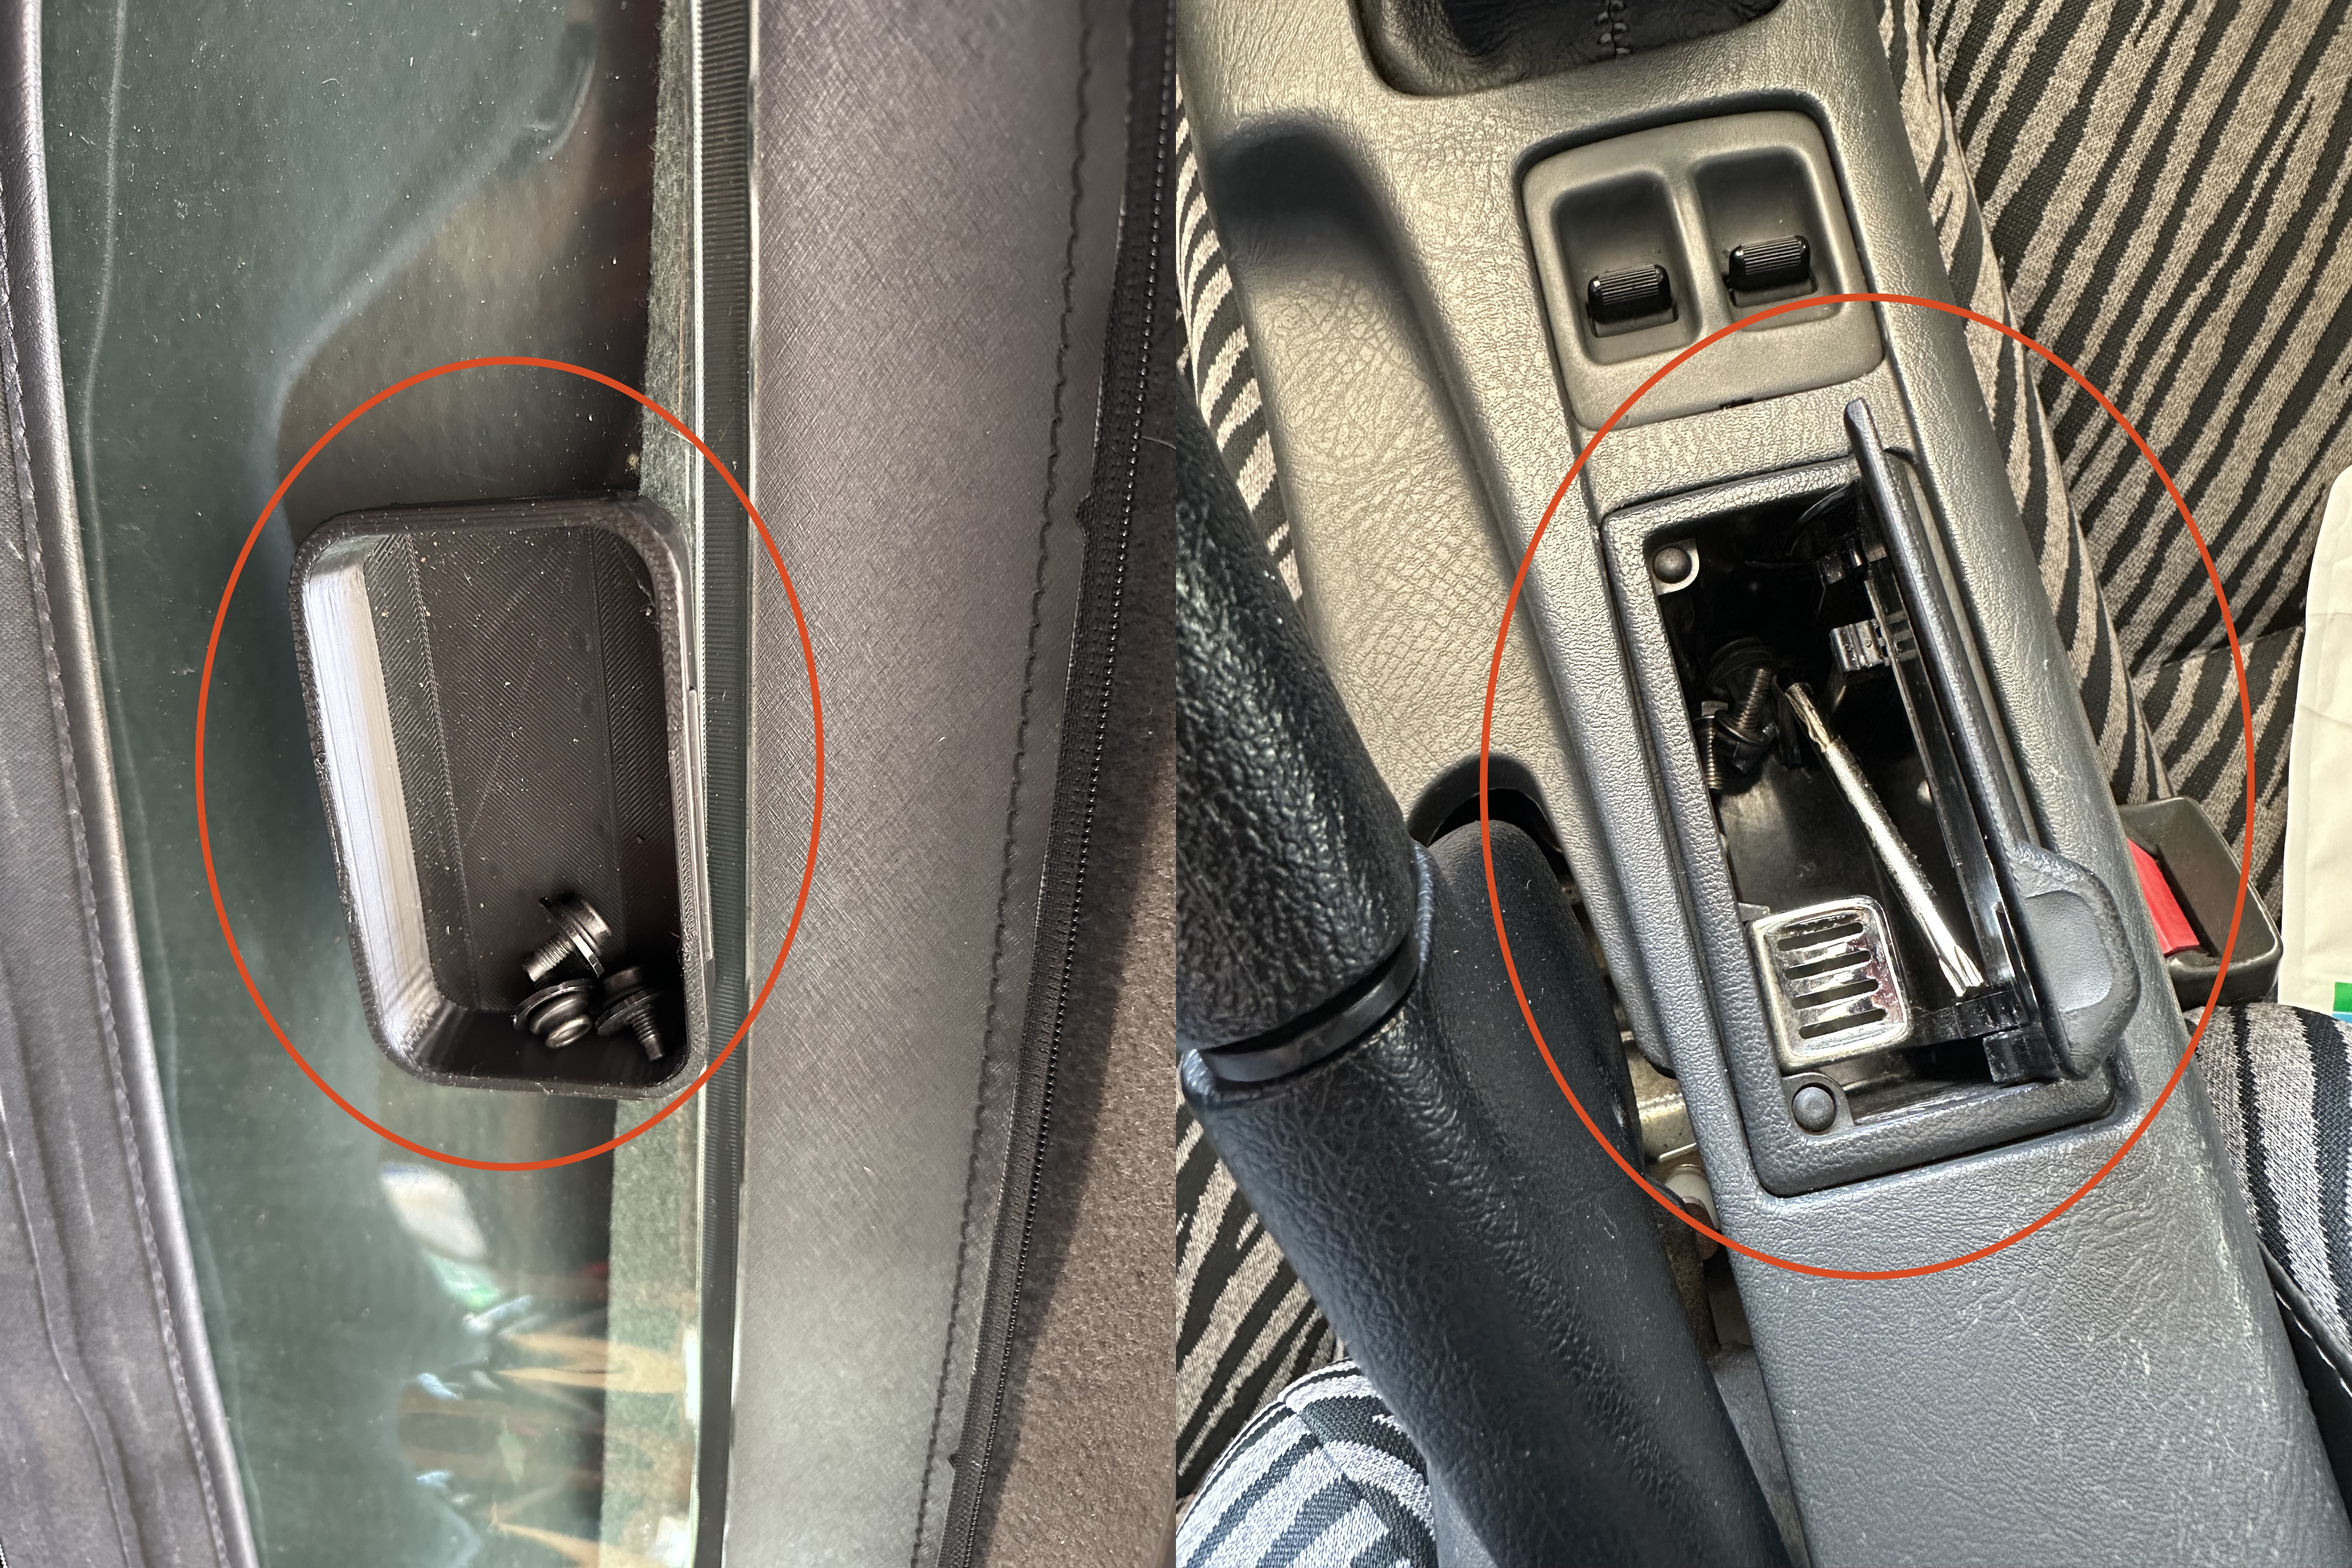
You could use a small tray (like this 3D-printed one on the left) or even the ashtray in your Beat:
My wife is an absolute genius and changed my life one day. She brought a closet jewelry organizer out to the garage along with a small pad of paper:
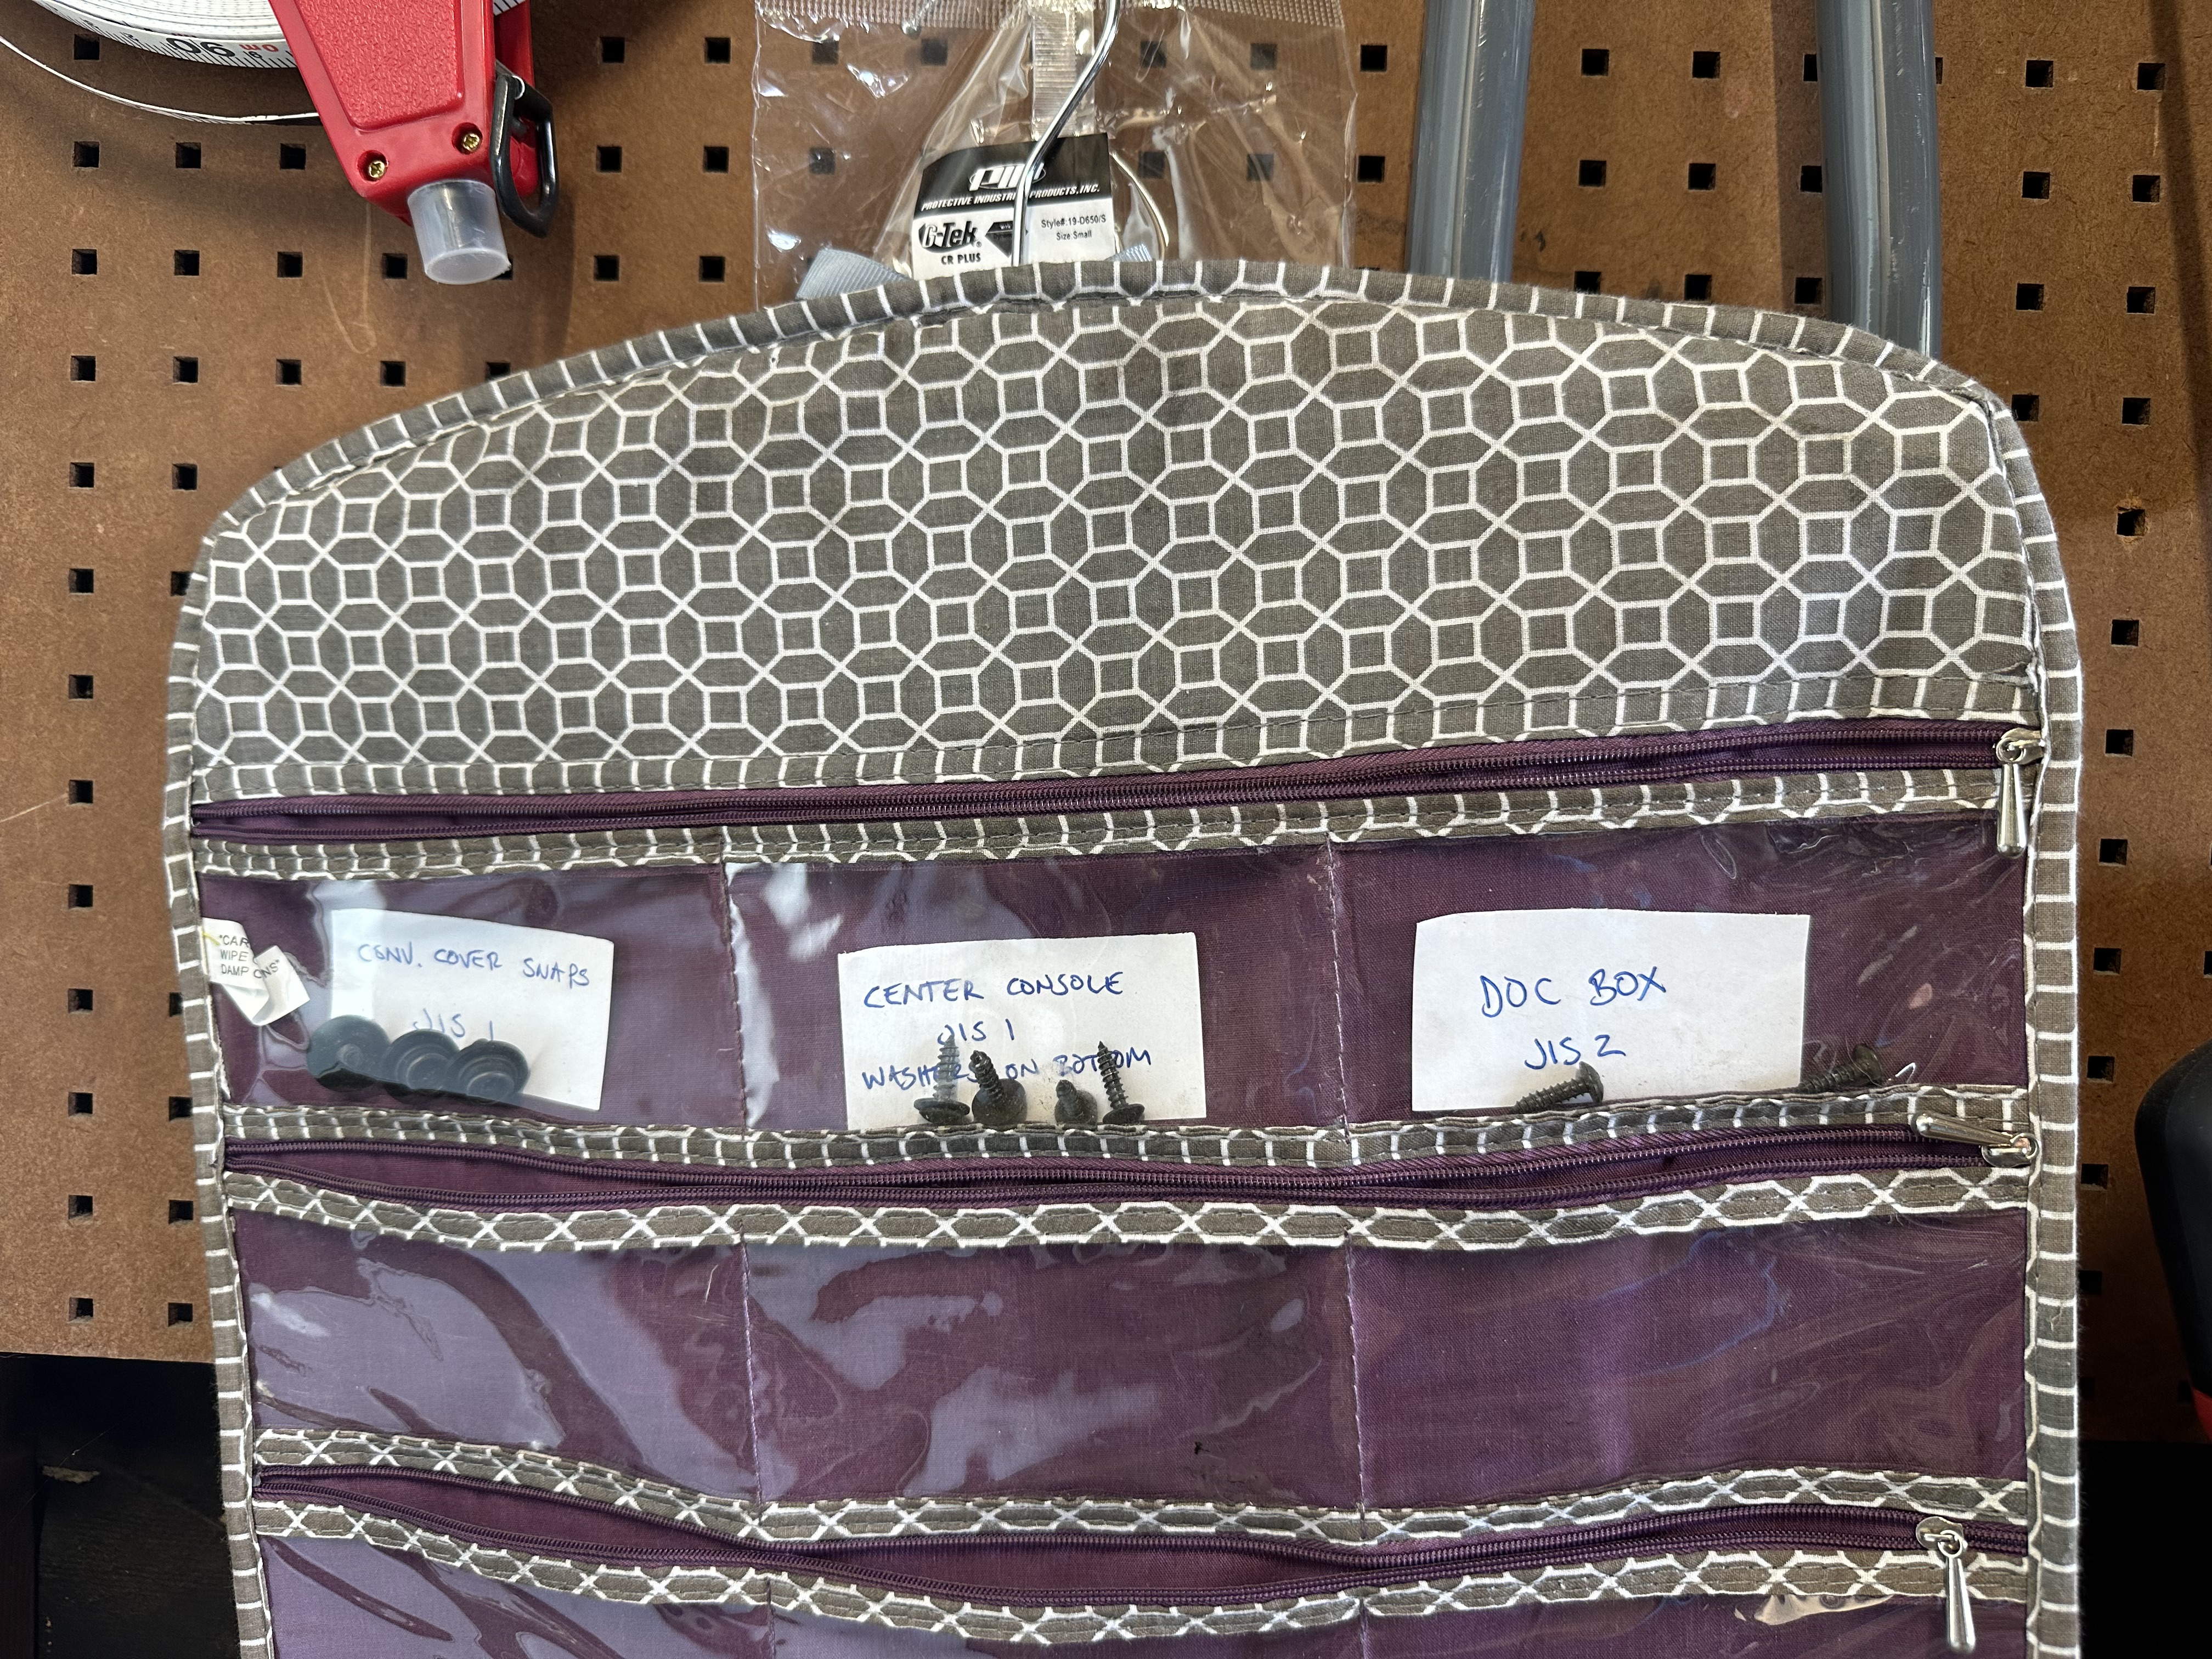
I now use this every time I work on a car. Whenever I remove a part, I put all of the fasteners in a pouch and label it with the part, fastener size, and any other relevant information. I’ve never lost another bolt or ended a job with extra hardware.
Step 1: Remove the subwoofer/cassette storage
Depending on how your Beat is optioned, you’ll either have cassette storage or a subwoofer mounted between the seats. There are 4 JIS screws holding this in place. Two on each side:
If you have the cassette storage, you can remove this piece from the car. If you have the subwoofer, you’ll either have to disconnect the wiring or lift the entire unit and rest it between the seats.
I have the subwoofer, so you’ll see this piece resting in the middle throughout the tutorial.
Aside: Why not clean your Beat?
Your Beat is 30+ years old at this point. It’s probably accumulated some gunk and grime in odd places. Now’s a great time to start cleaning some of the hard-to-reach spots as you remove panels from the car.
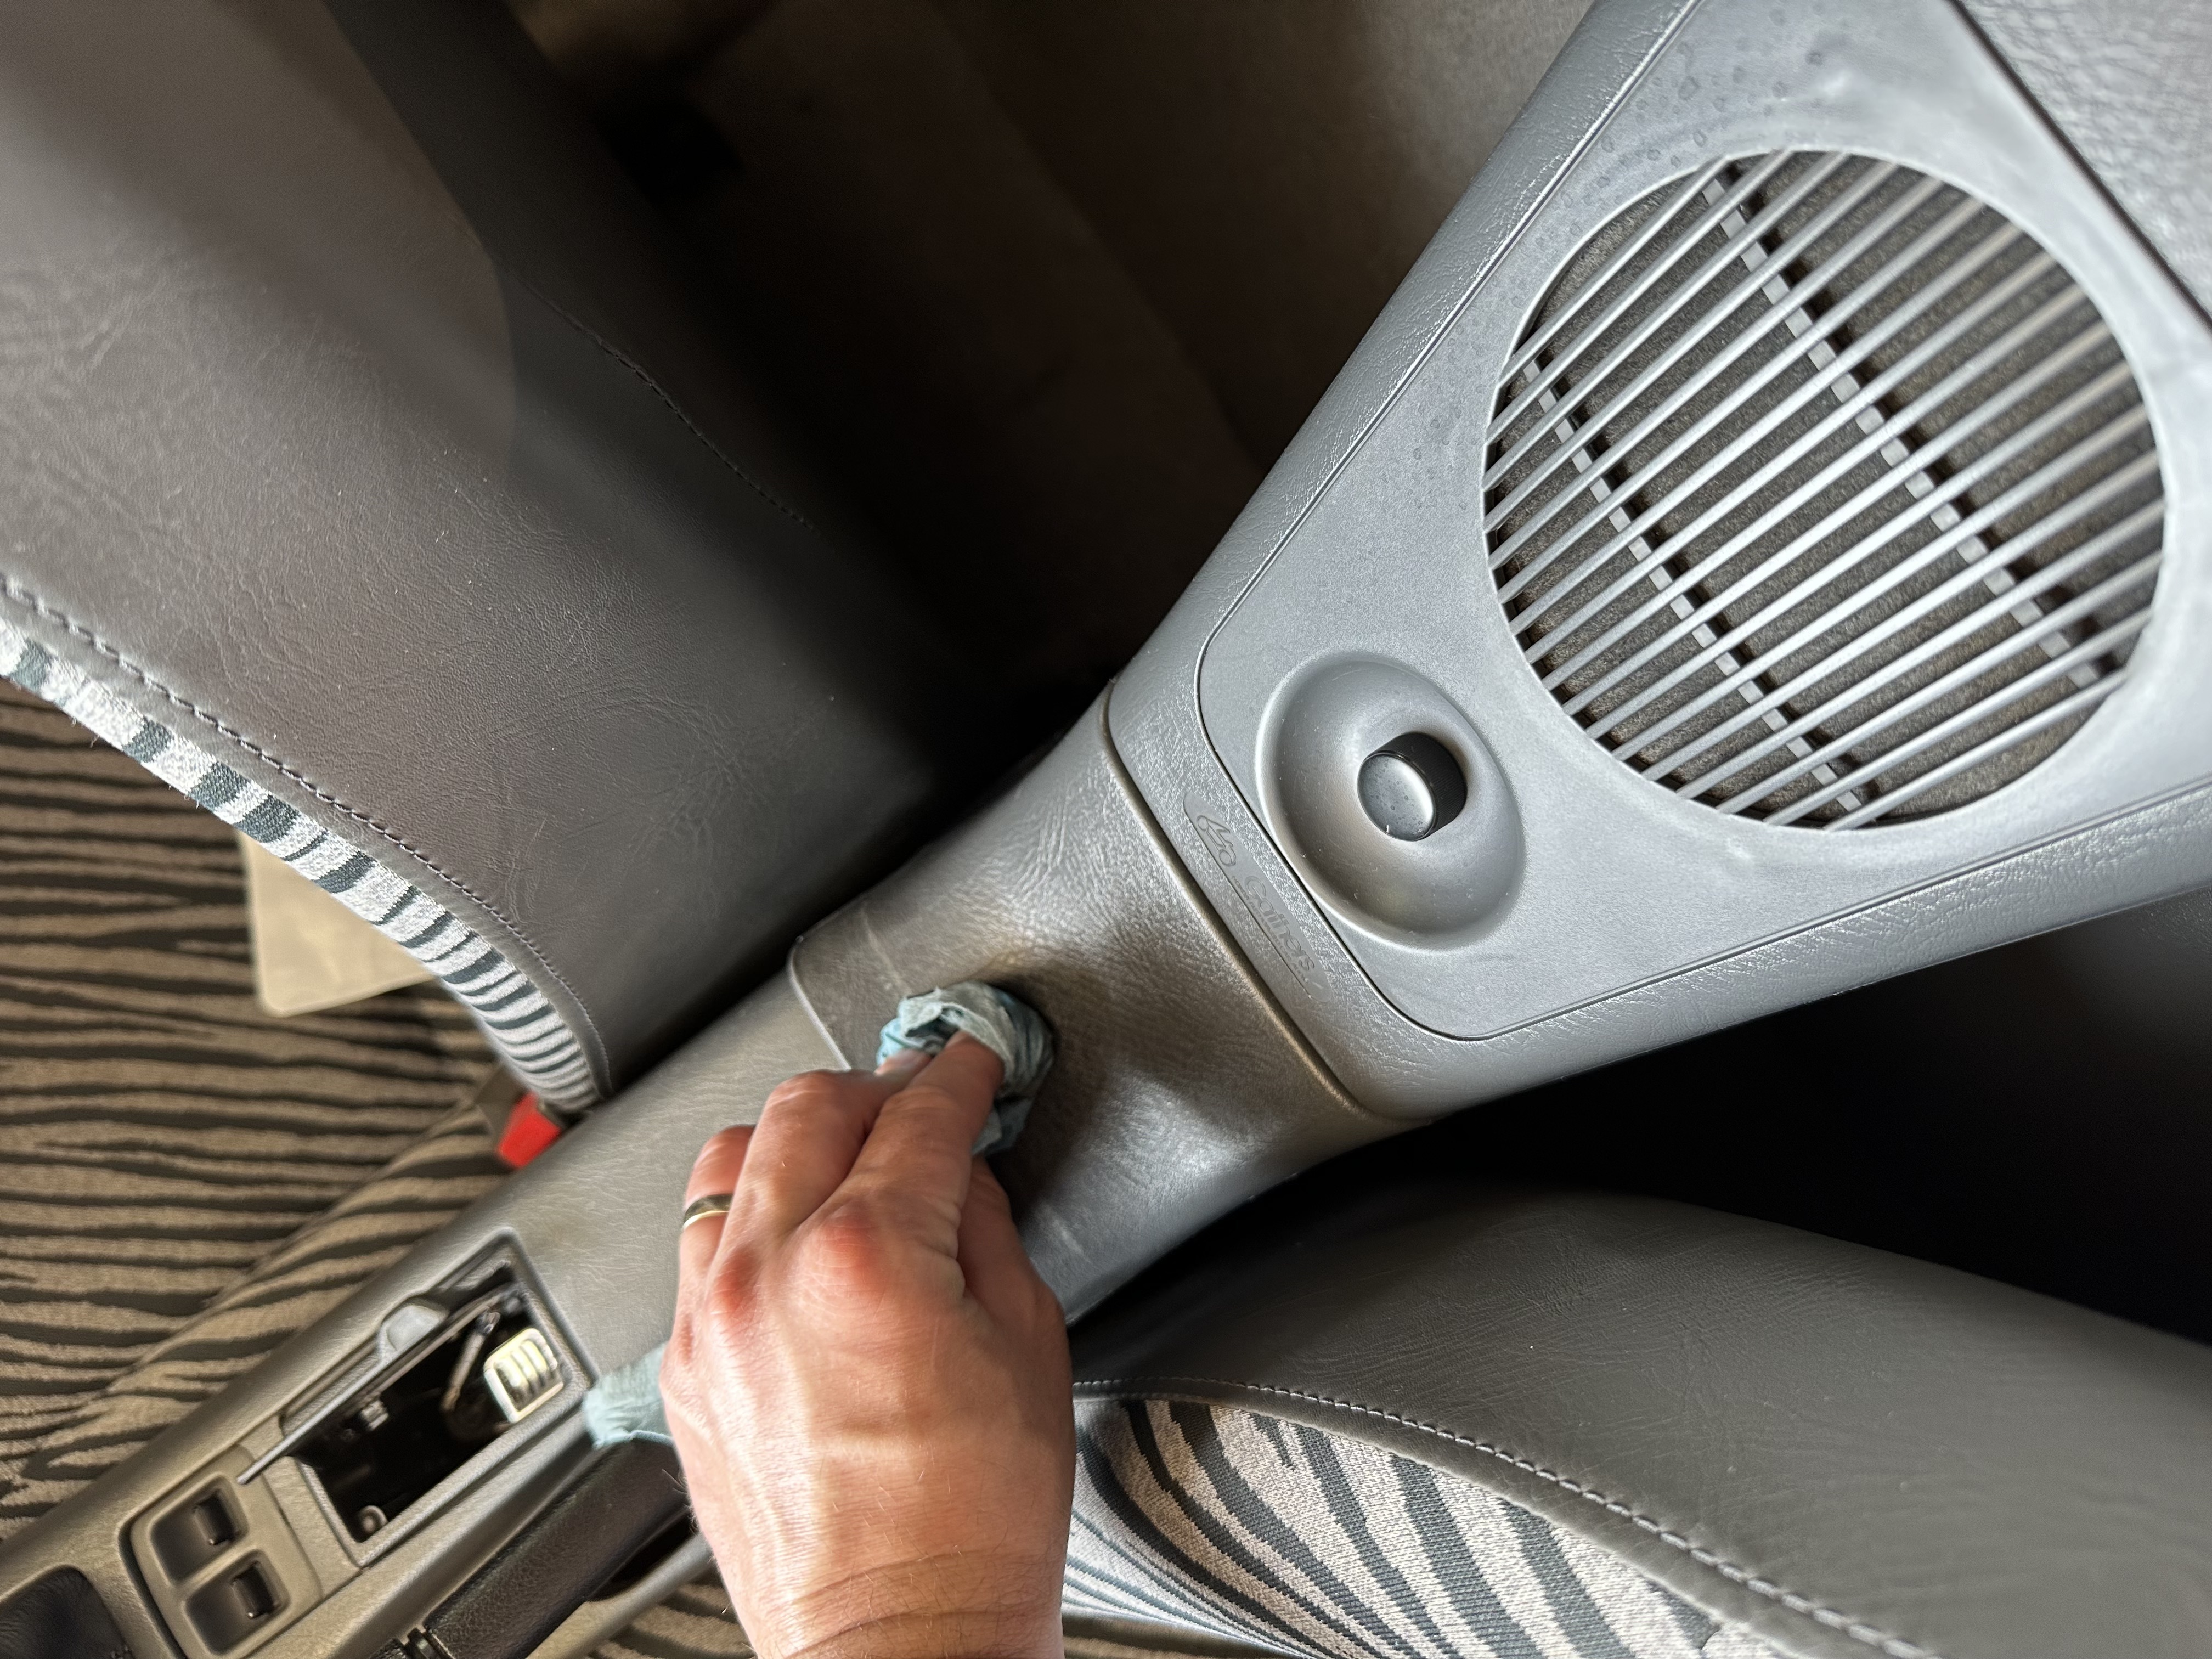
Step 2: Remove/loosen the door trim
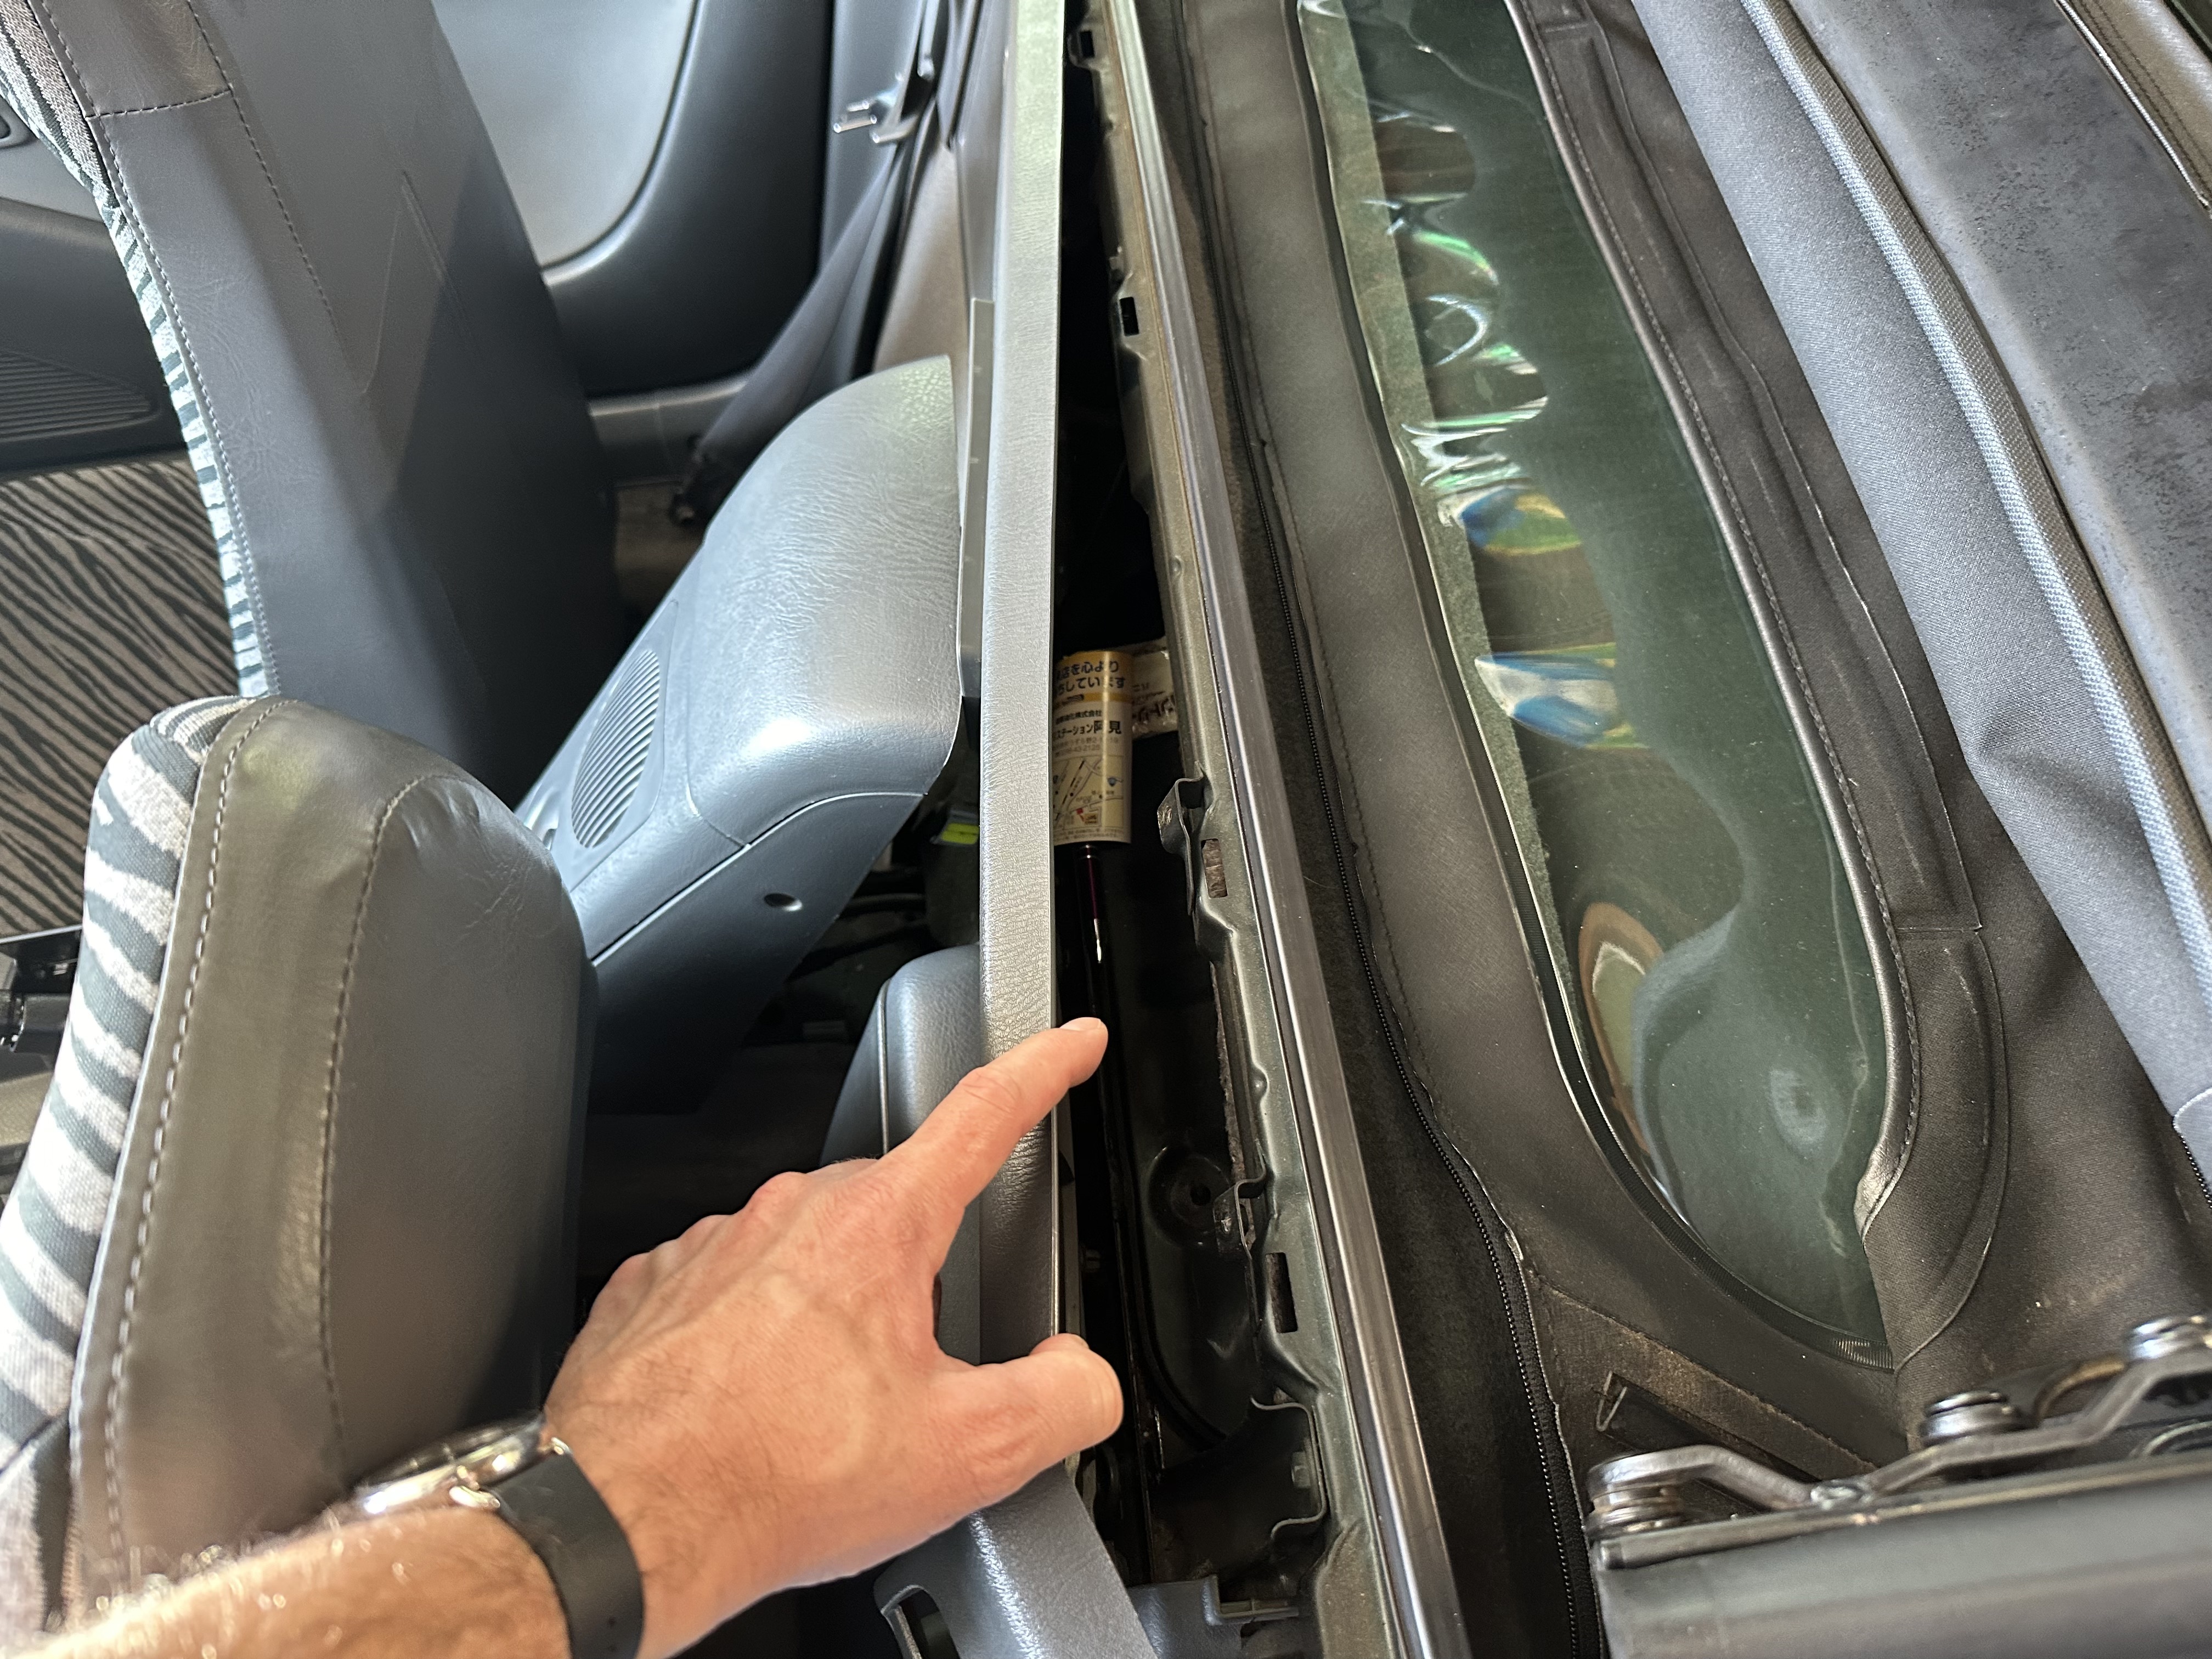
Next we need to loosen the door trim that runs from the sills up to the rear deck. We need to completely remove the trim pieceon the passenger side, but we only need to loosen the top on the driver’s side.
Start on the driver’s side and pull the trim toward the front of the car from the top. We’re just trying to loosen it. Do not try to completely remove the piece, as it’s screwed in toward the bottom.
Once the driver’s side trim is loosened, move to the passenger side and do the same thing. Then remove the JIS screw at the bottom of the trim:
Once removed, move this trim piece out of the way. Your best bet is to pull the seat belt out a bit and rest the trim in the passenger seat or on the rear deck.
Step 3: Remove the rear trim
Before you start this step, you’ll want to move the seats as far forward as possible.
There should be 4 JIS snap screws along the back trim that are used to secure the soft top cover. We’ll need to remove all of them:
Be particularly careful with these screws because you can only buy replacements in Japan. As of writing, they’re each ¥400 (≈$2.74) from Honda before shipping.
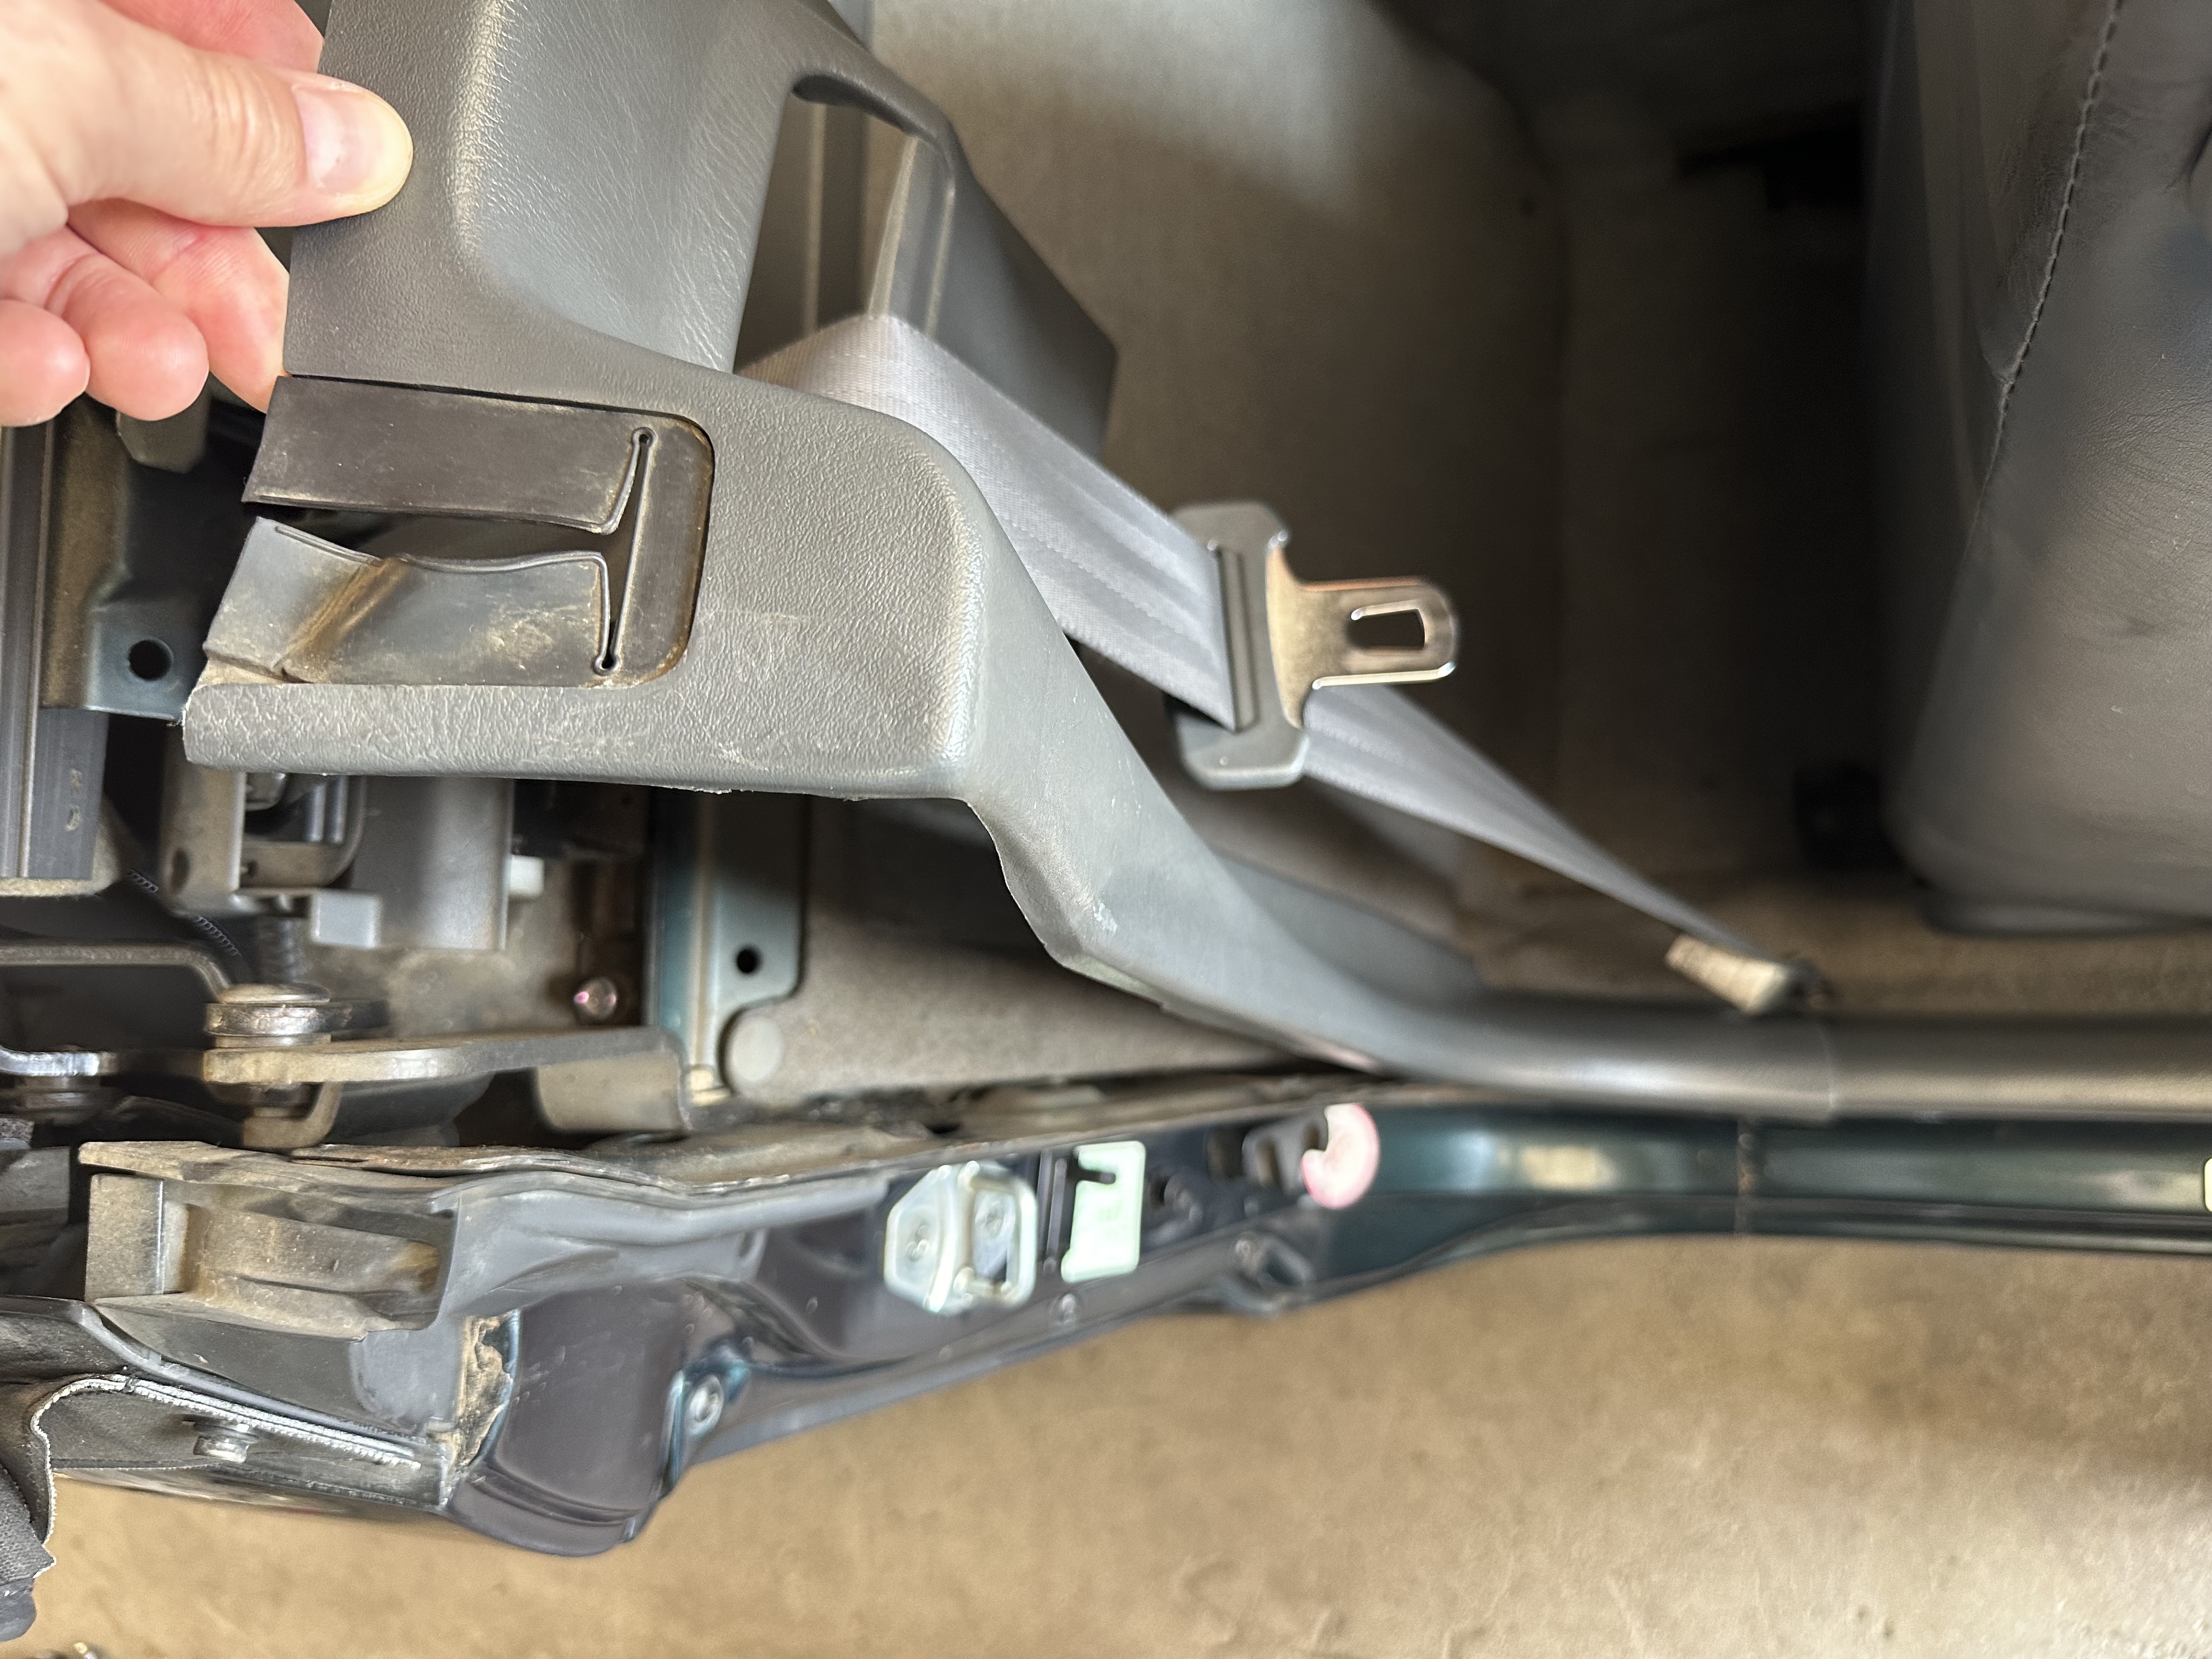
Once all of the snap screws are removed, you can start pulling the trim toward the front of the the car until you release 6 fasteners. Once loose, pull the trim straight up.
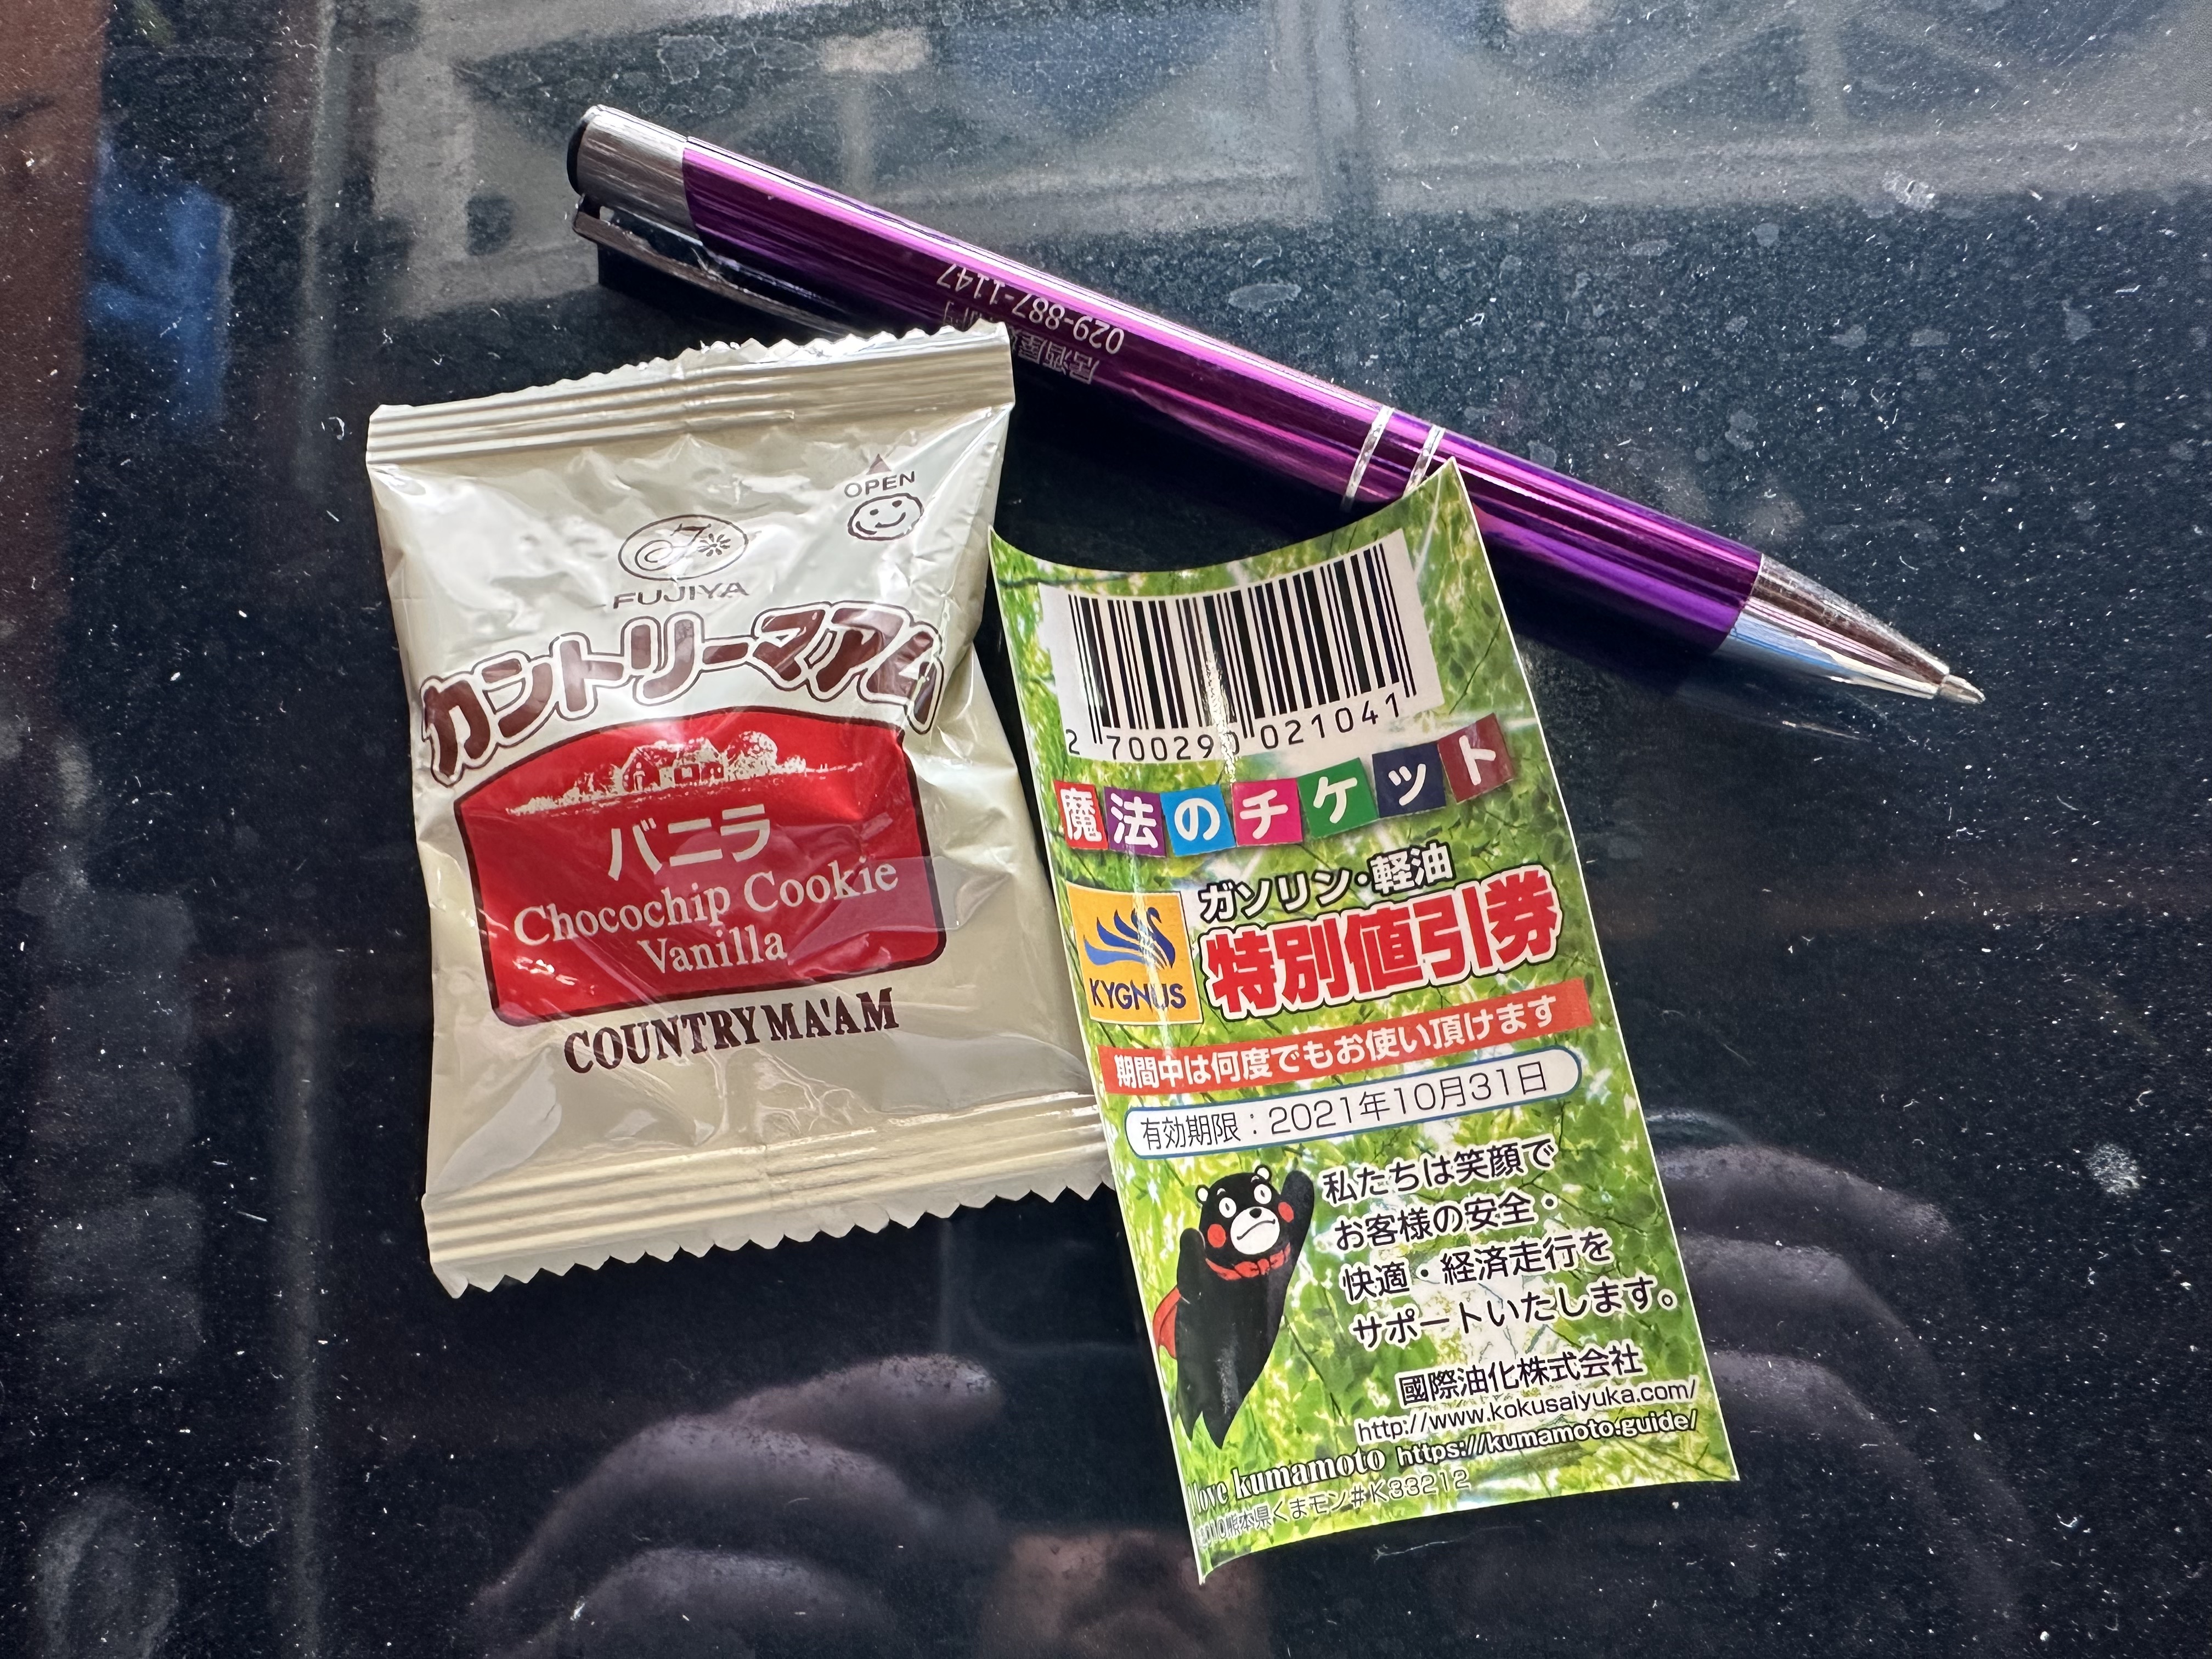
If you’re lucky, you might find some goodies hidden inside of the trim. I found a pen, a gas discount card, and an unopened cookie:
This is what the piece looks like when it’s removed:
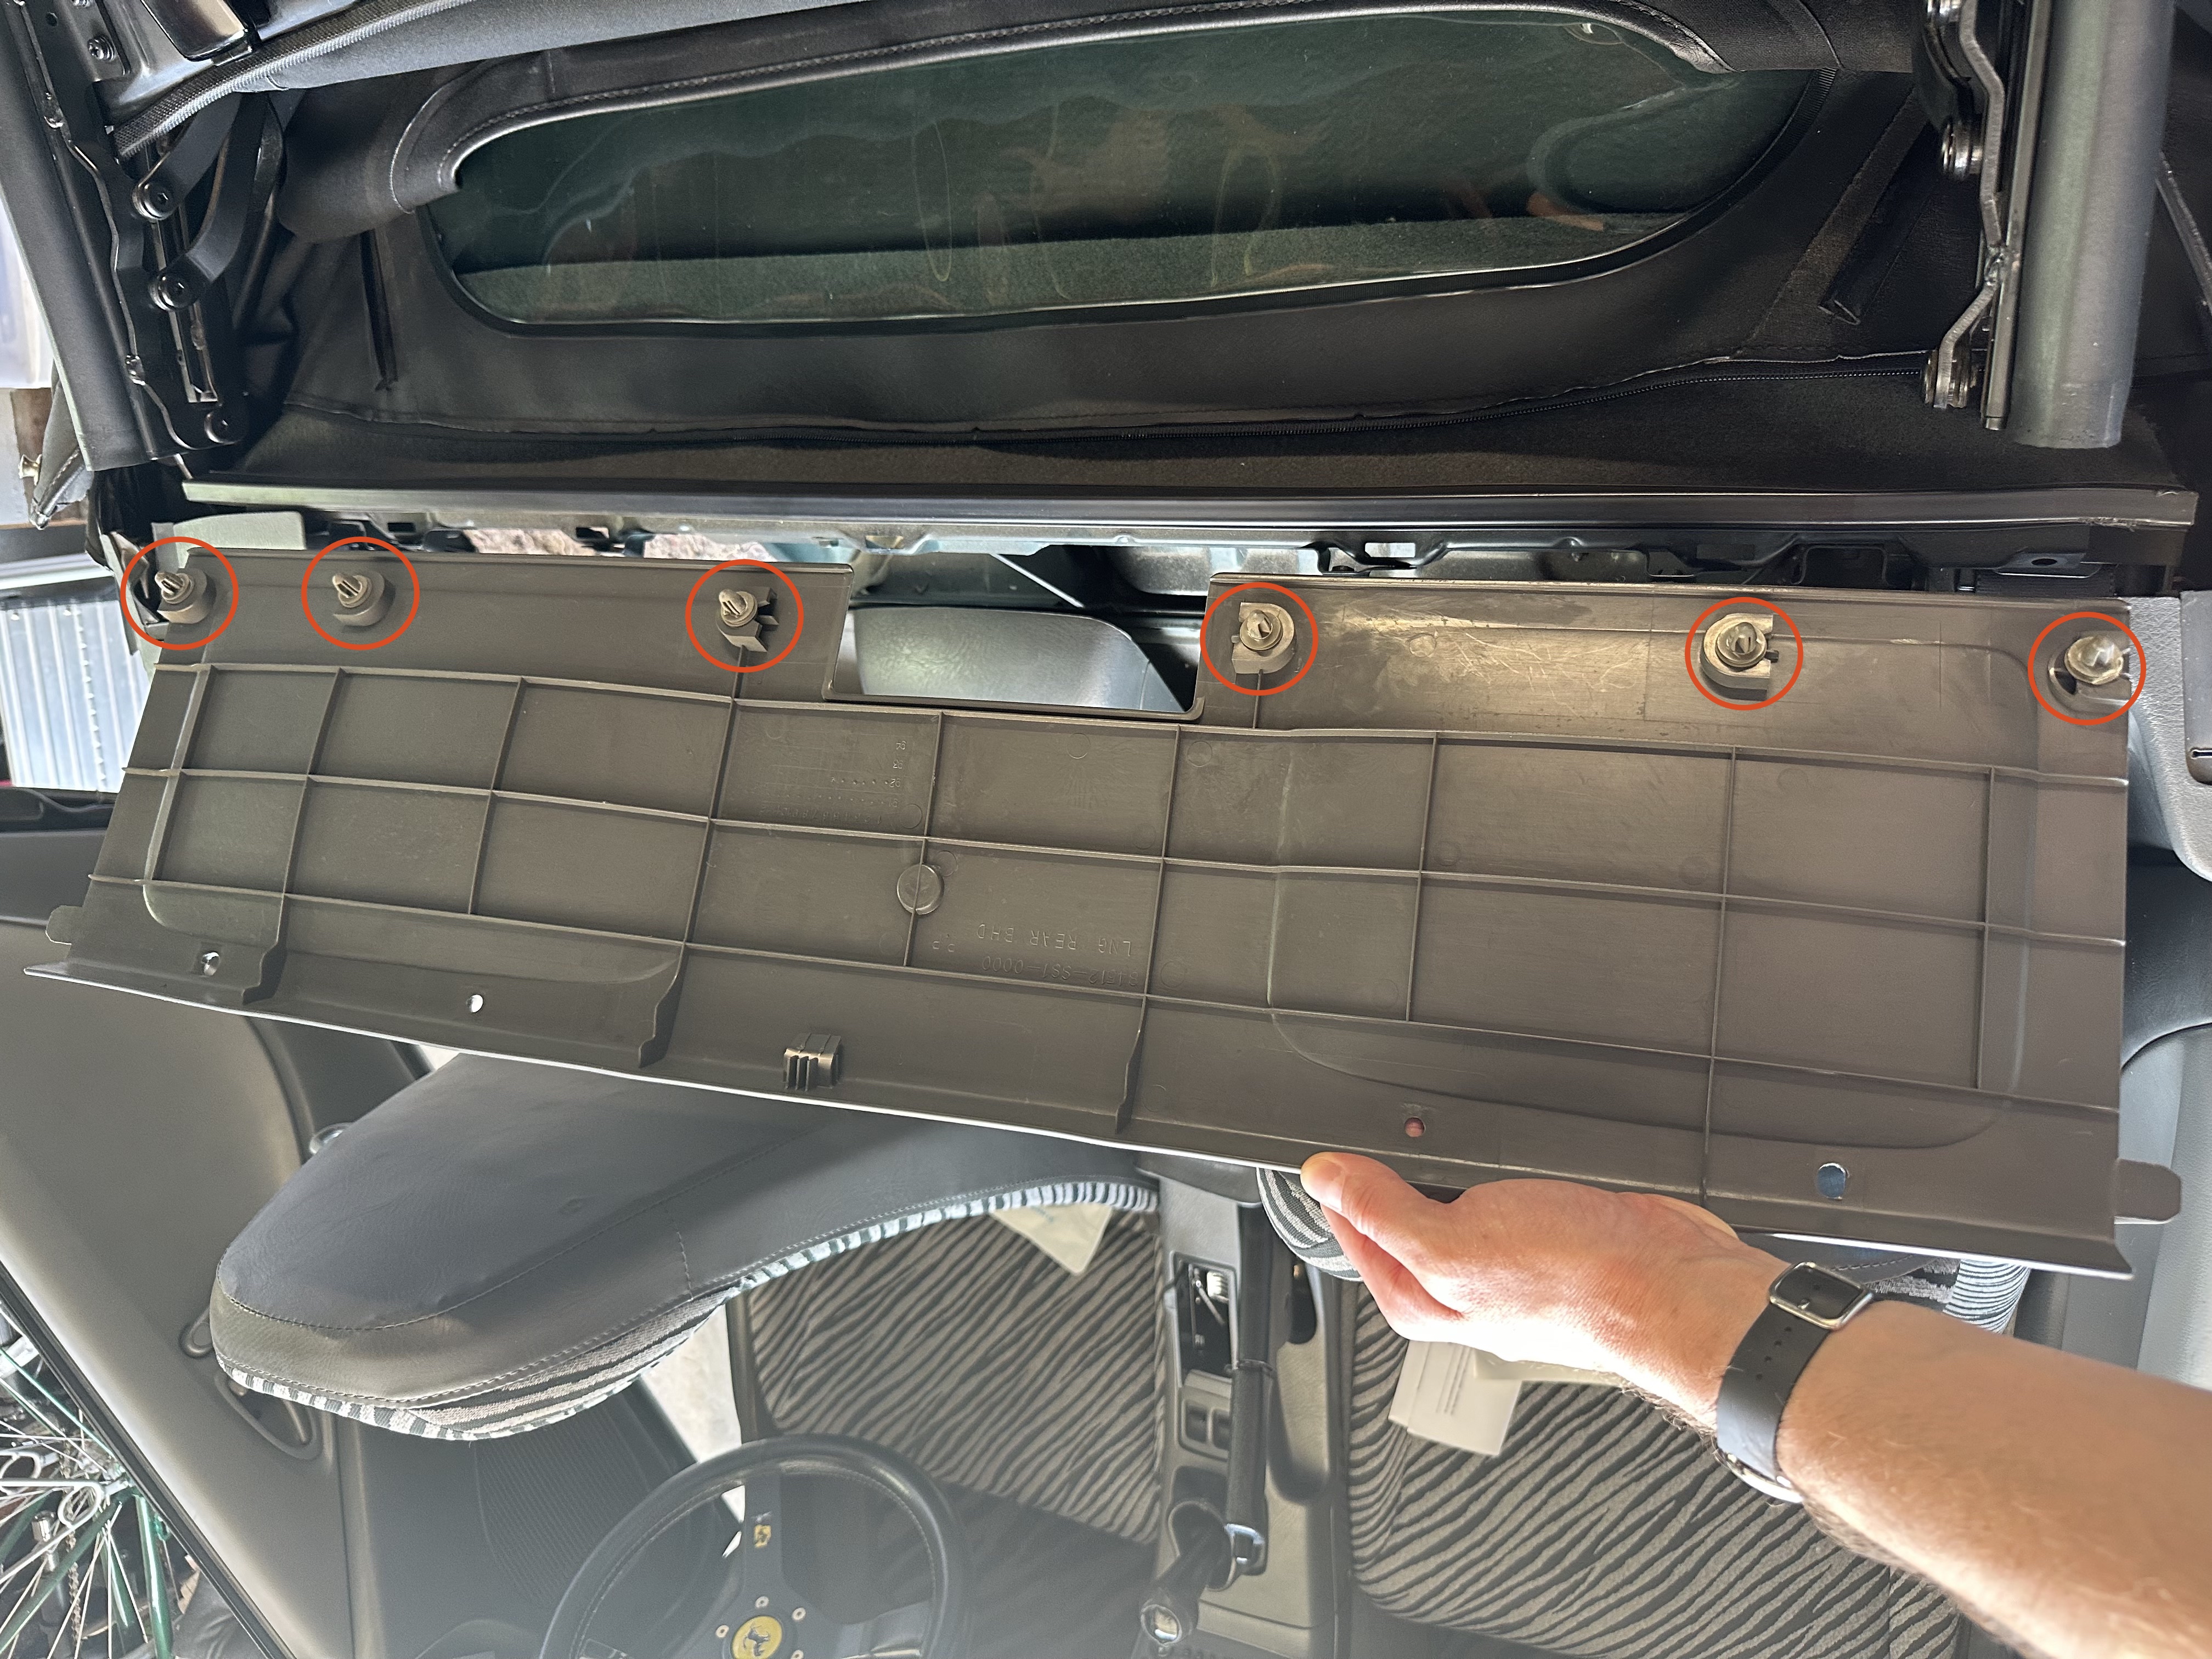
I’ve circled the 6 fasteners you need to pop out when pulling toward the front of the car.
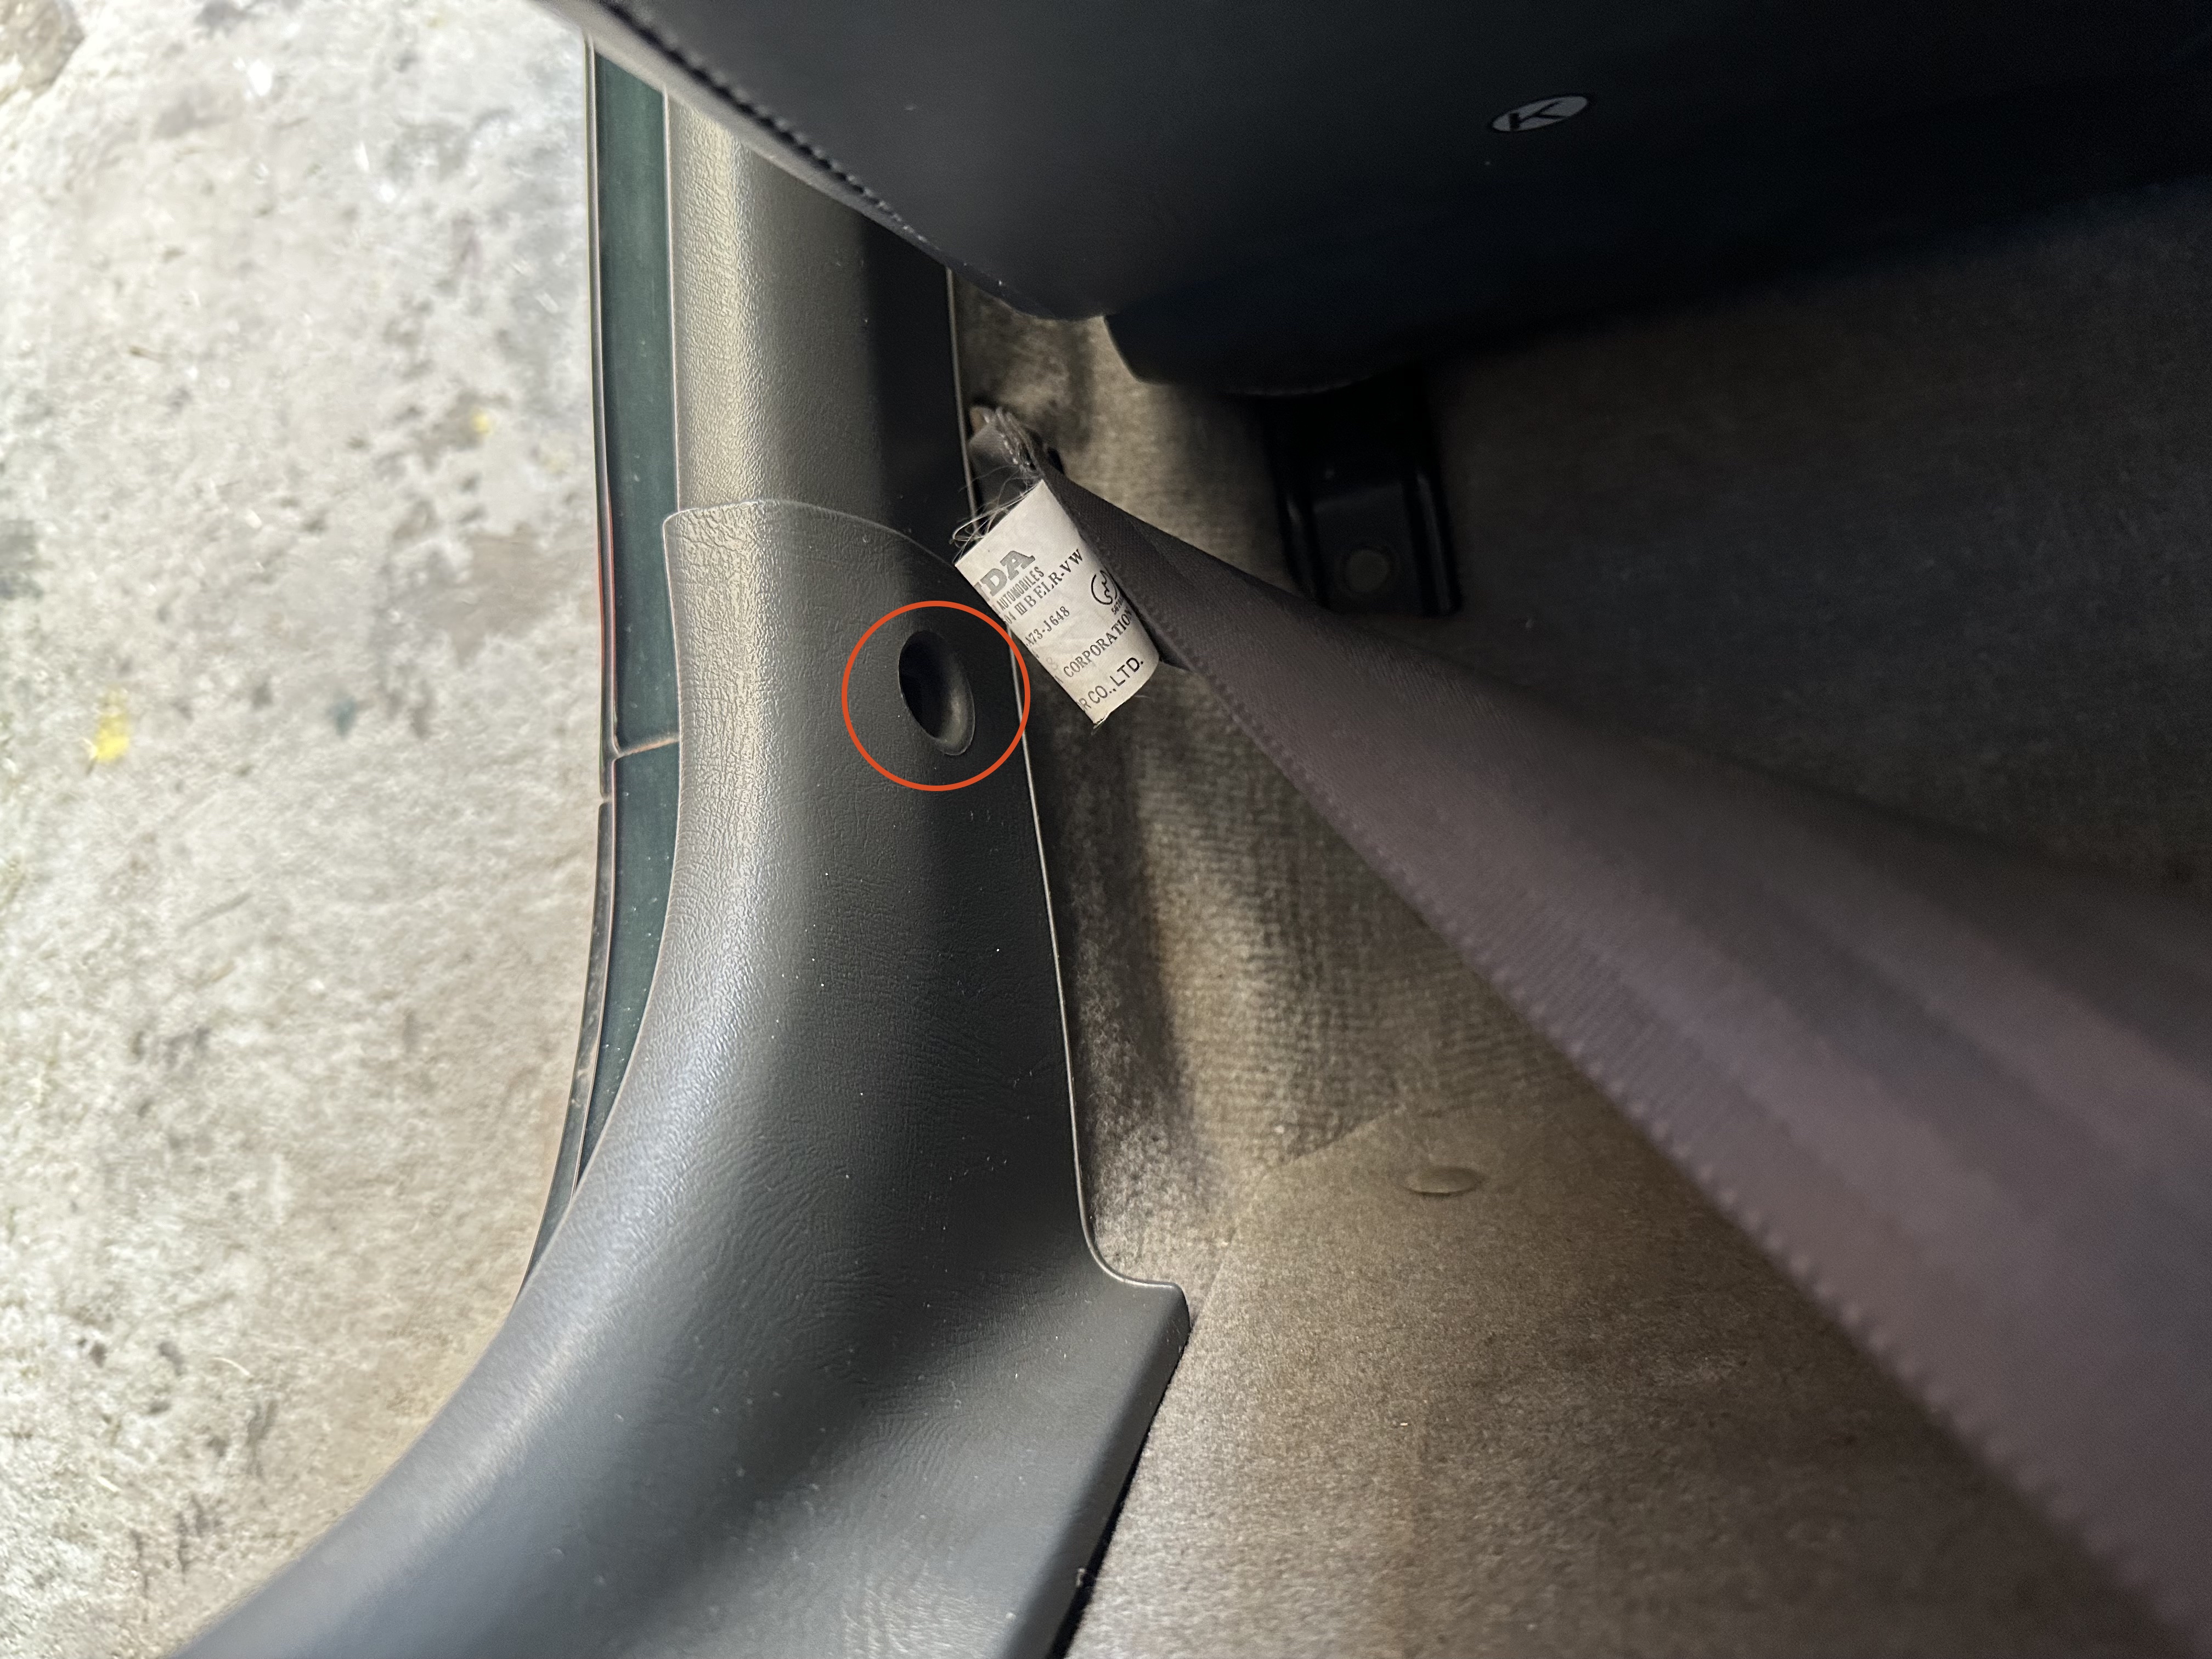
Step 4: Remove the document box
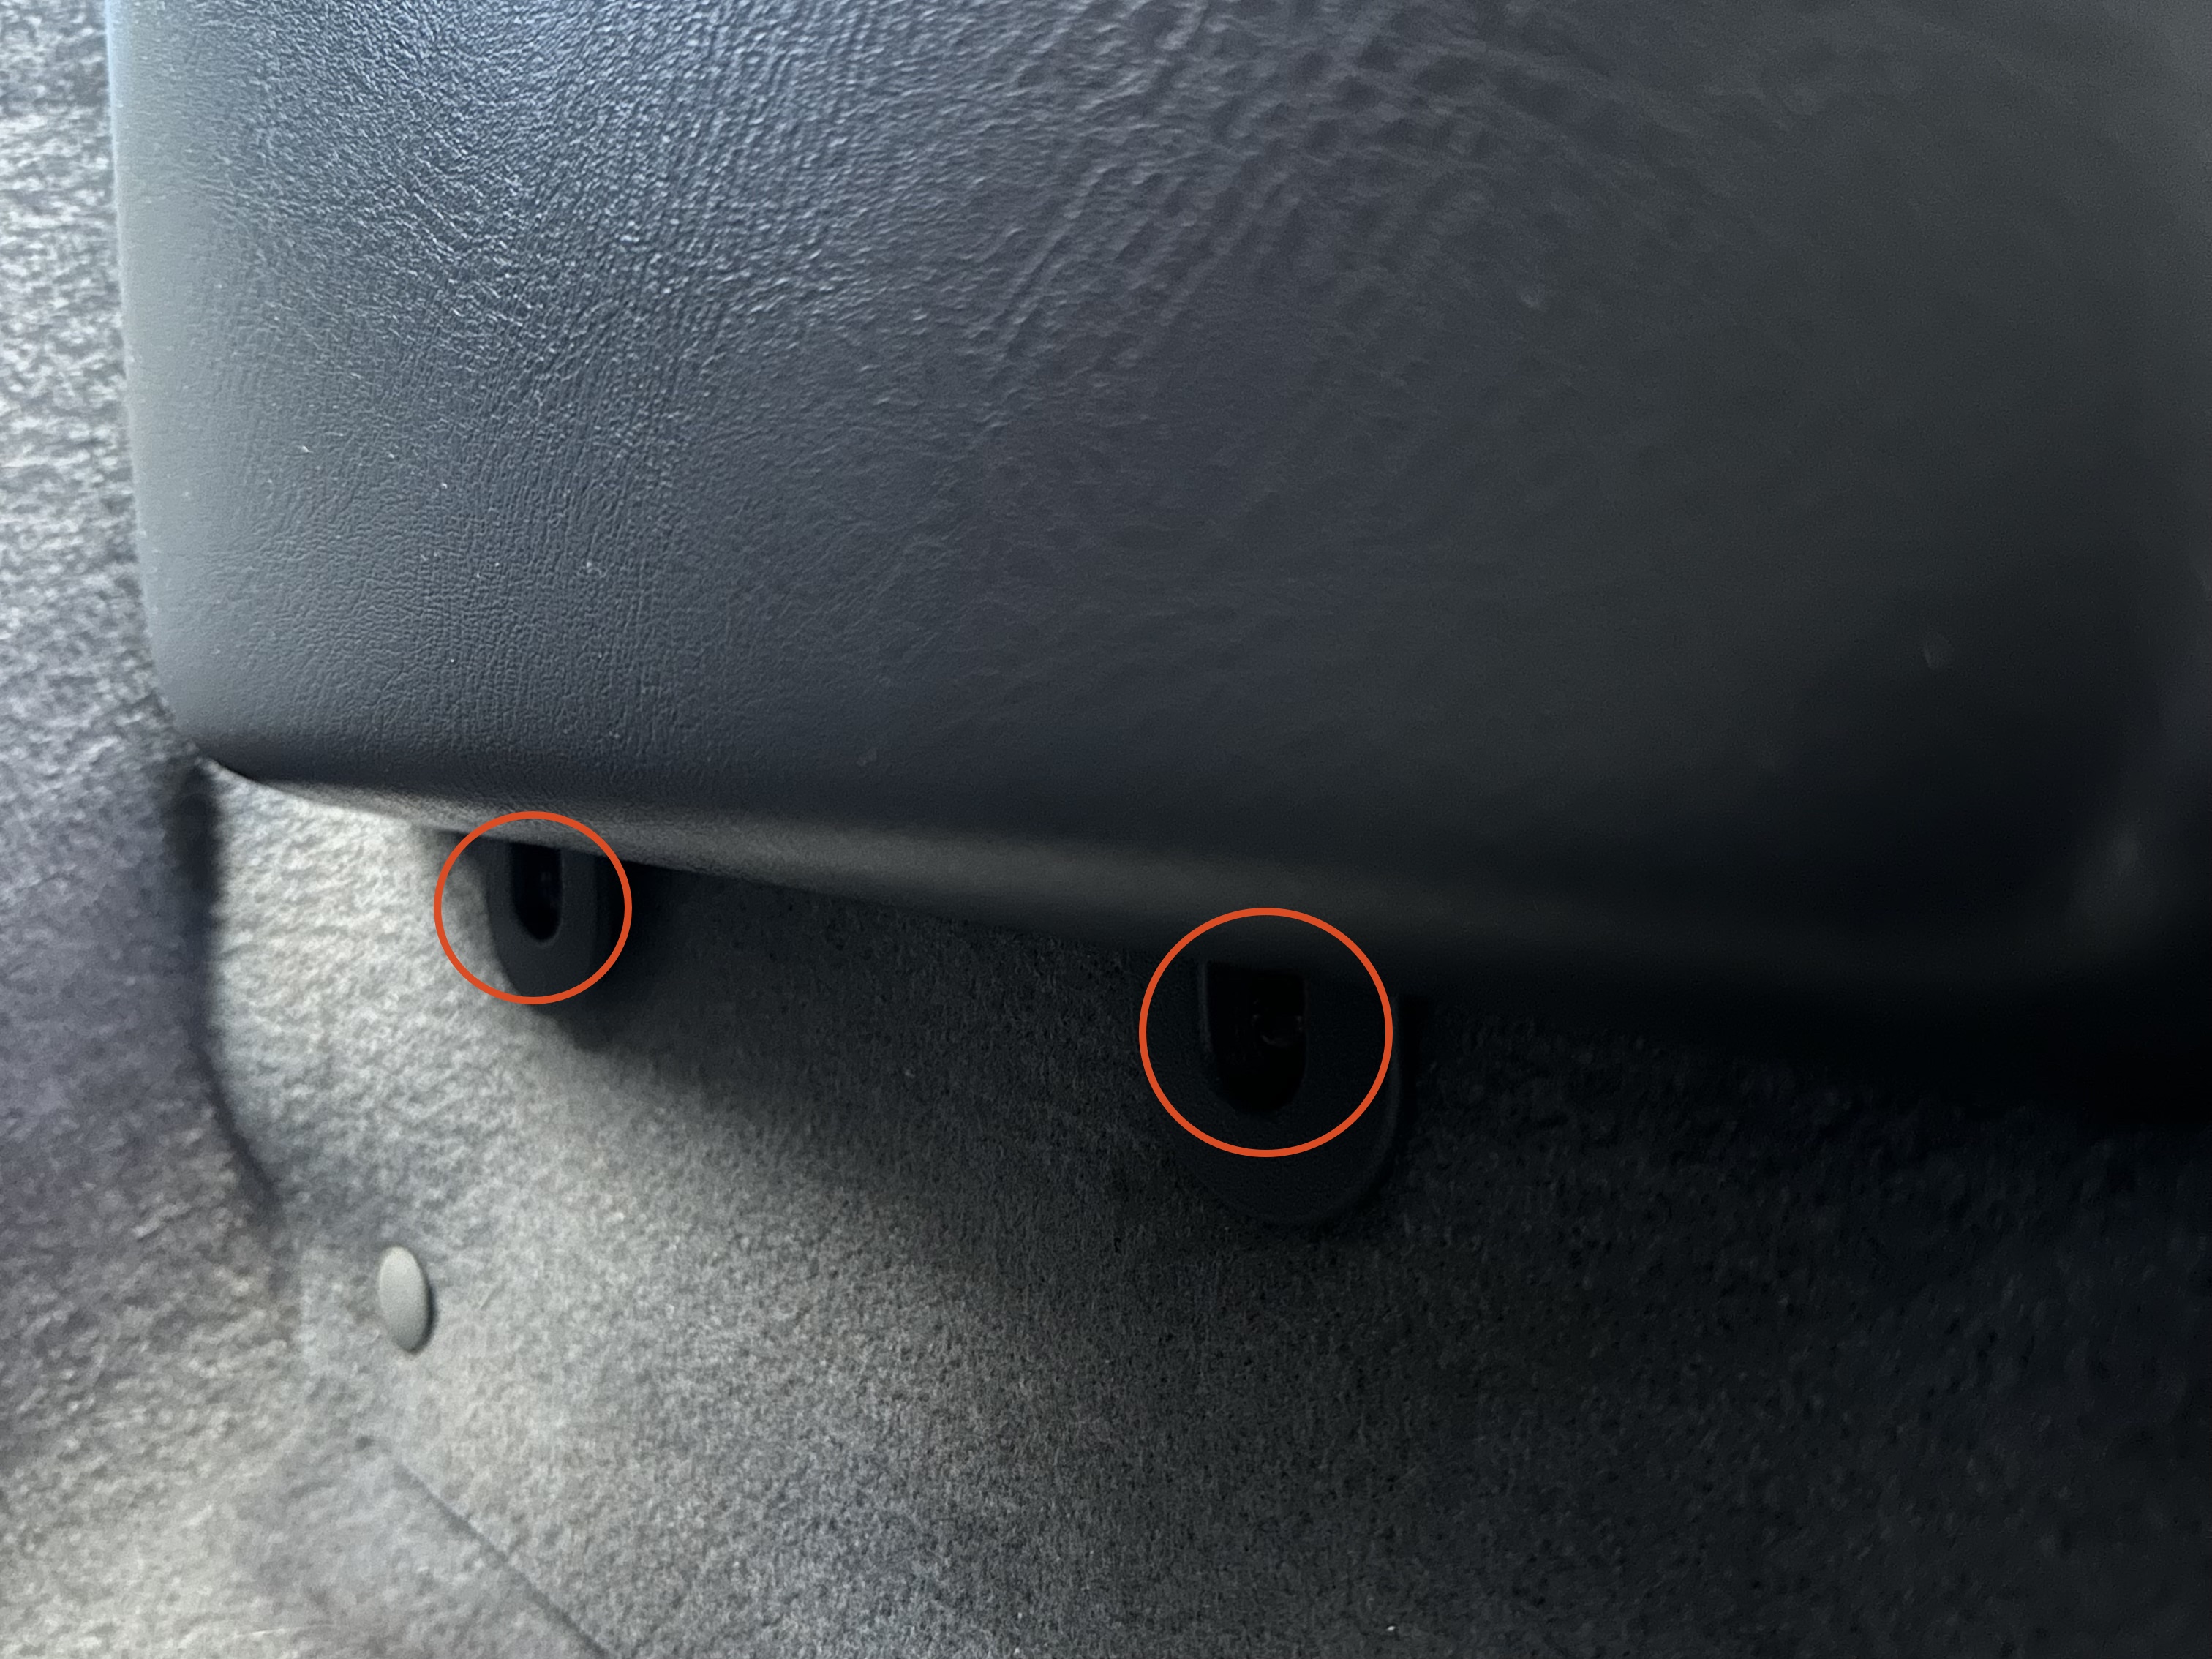
With the rear trim out of the way, we can now remove the document box behind the passenger seat. There will be two JIS screws at the bottom:
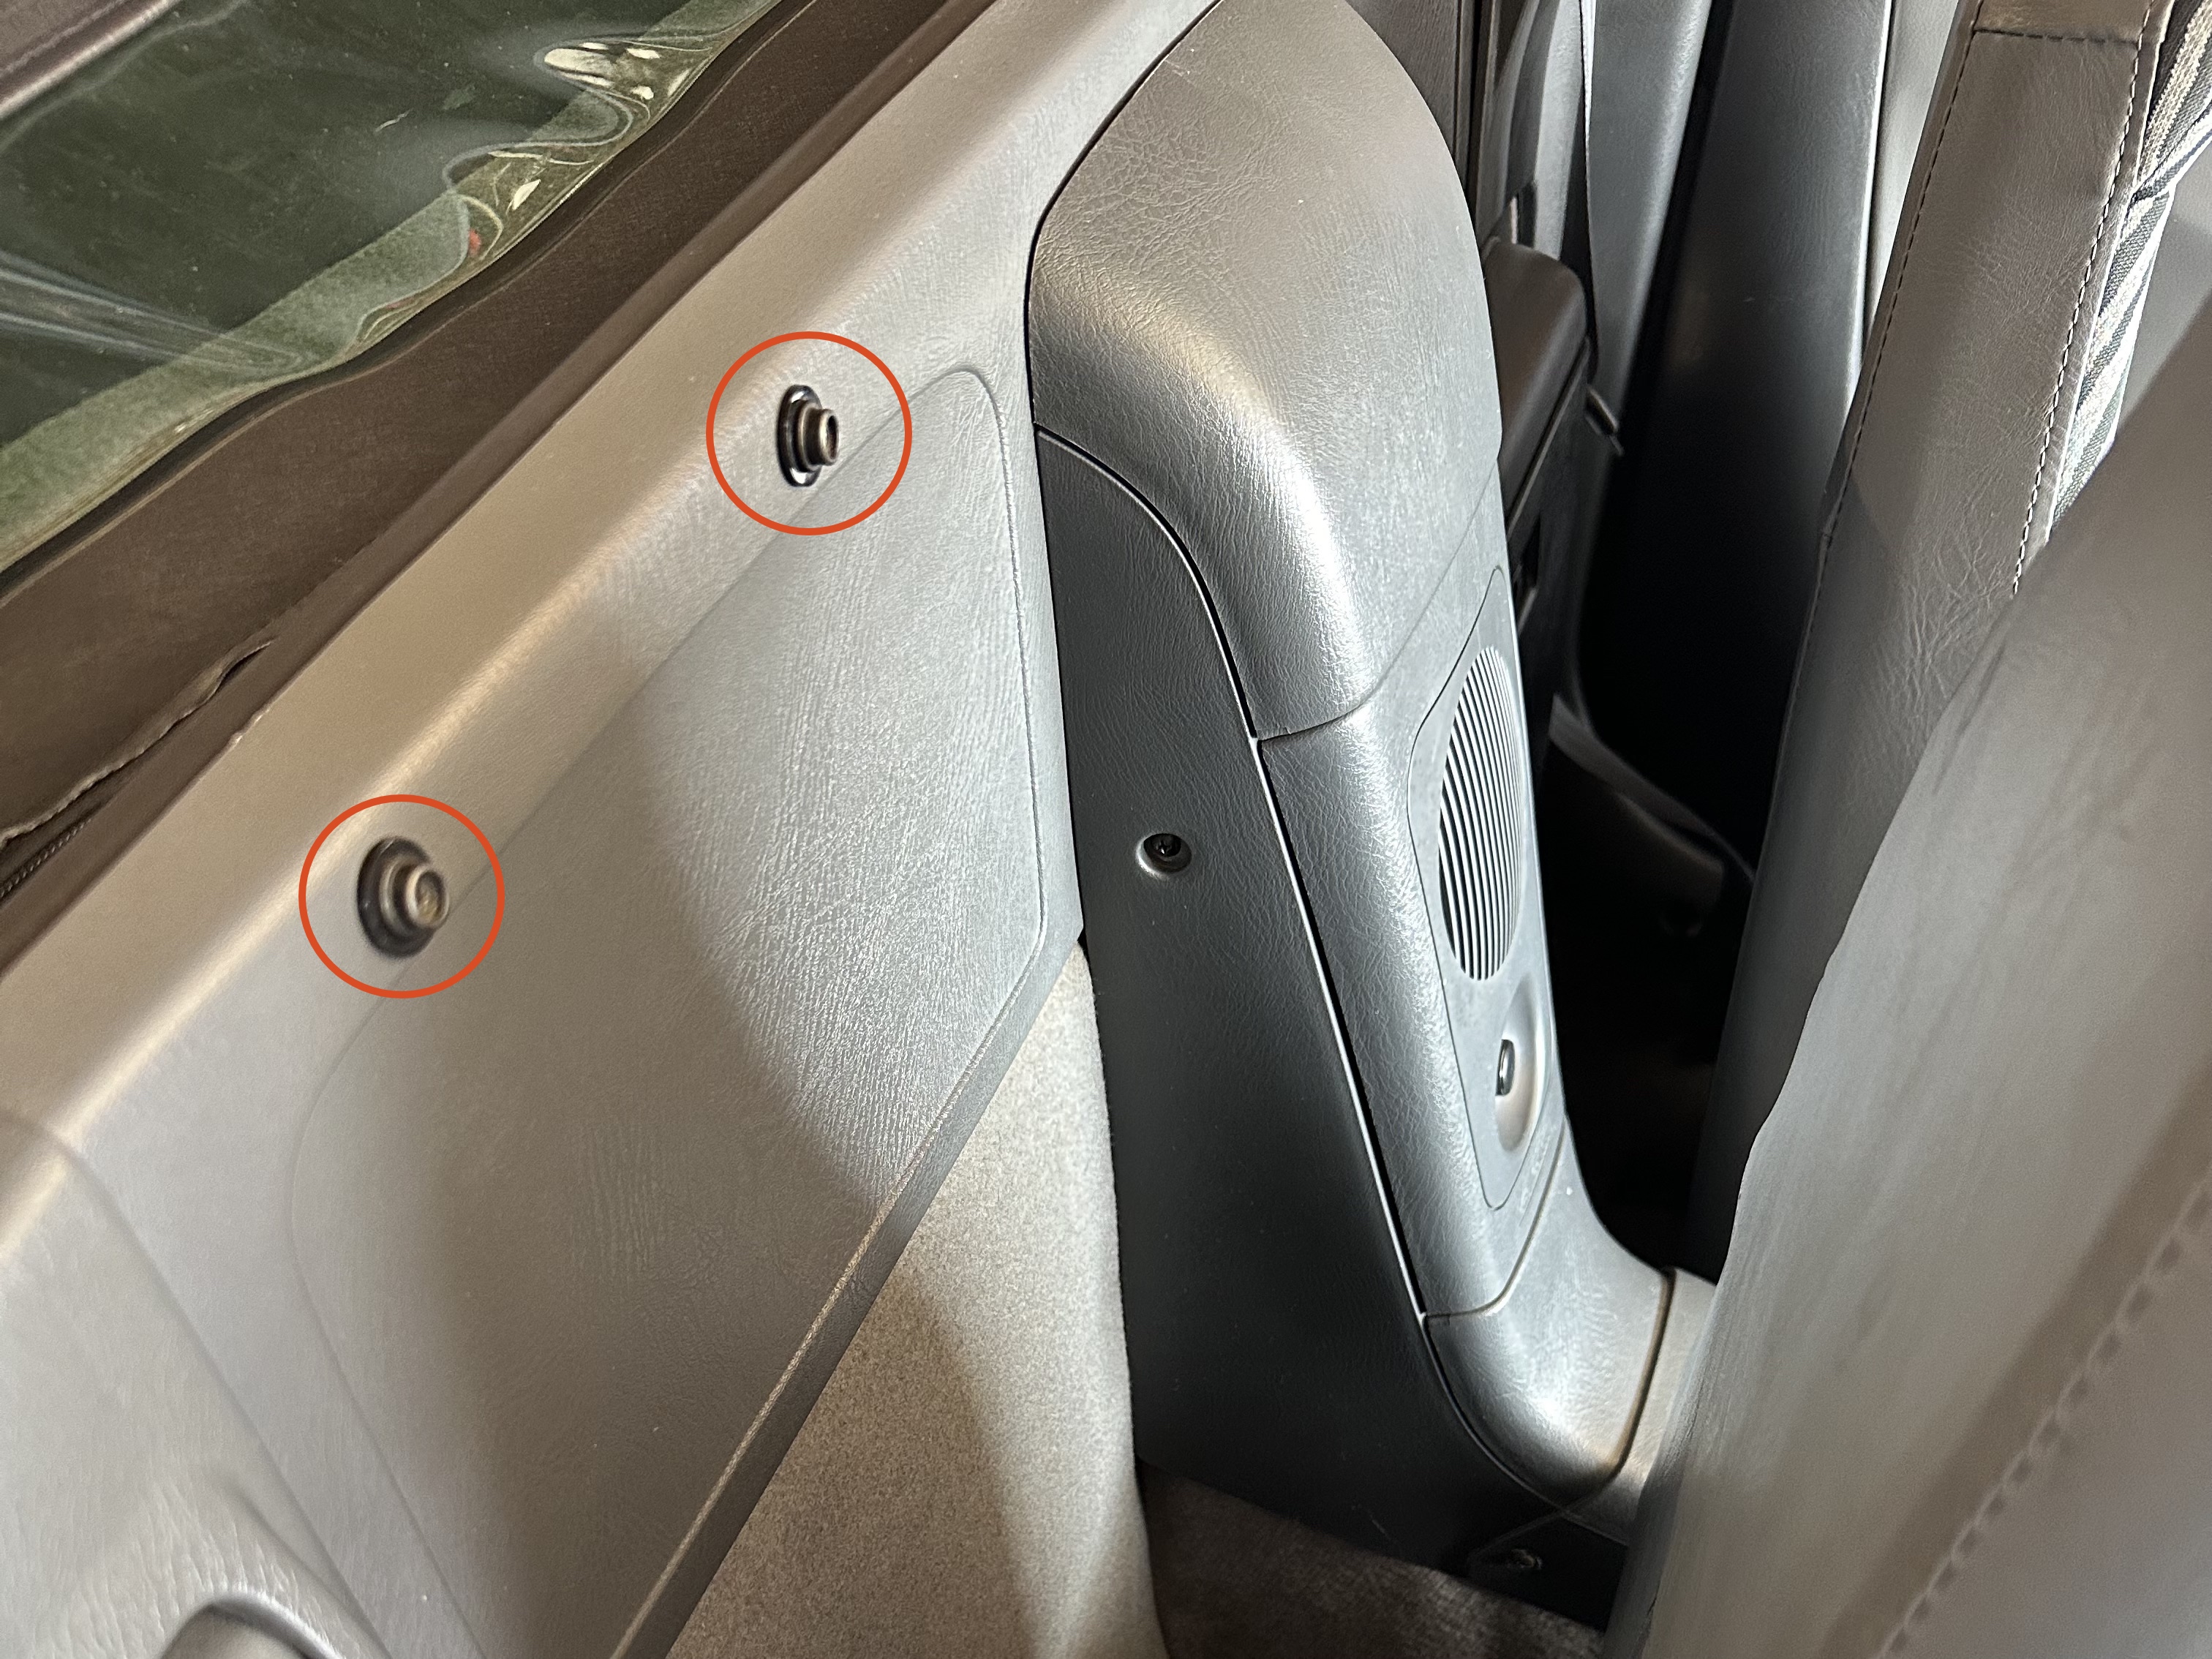
And two JIS screws at the top:
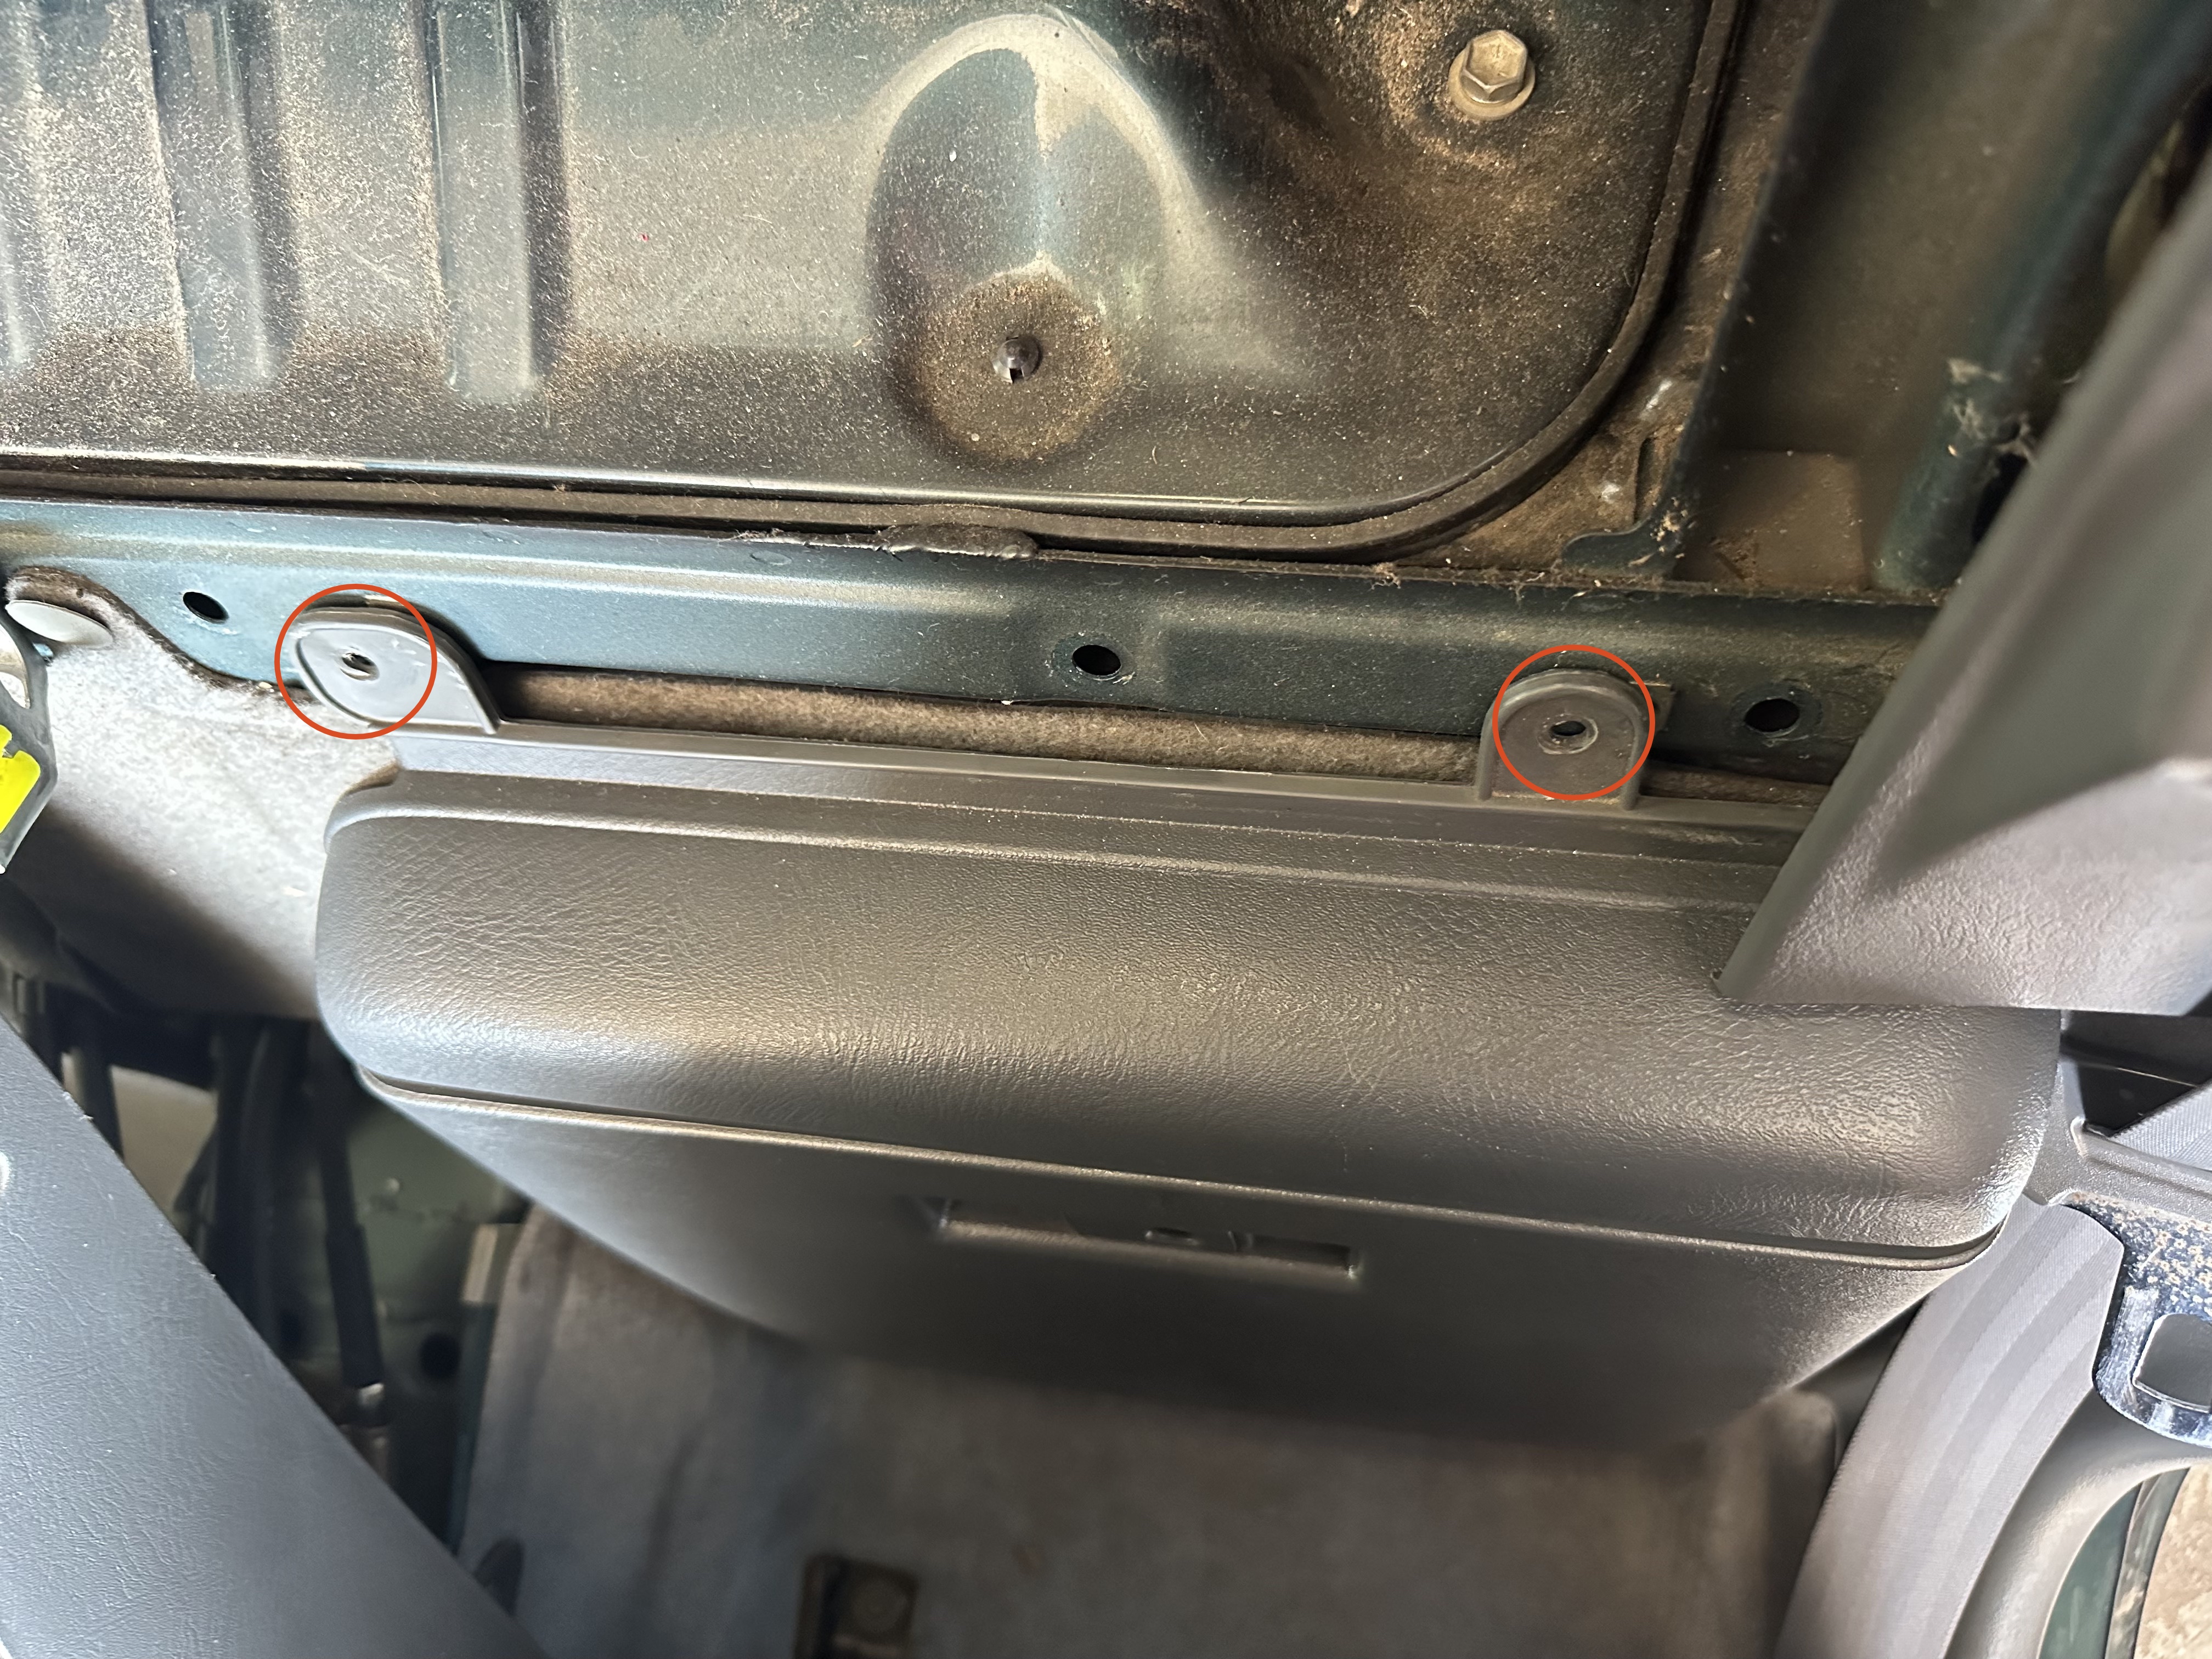
You may have noticed that my top screws are missing. I can only assume the prior own got rid of these for weight savings. Fortunately, these aren’t particularly special and I was able to replace them from my drawer of orphaned screws.
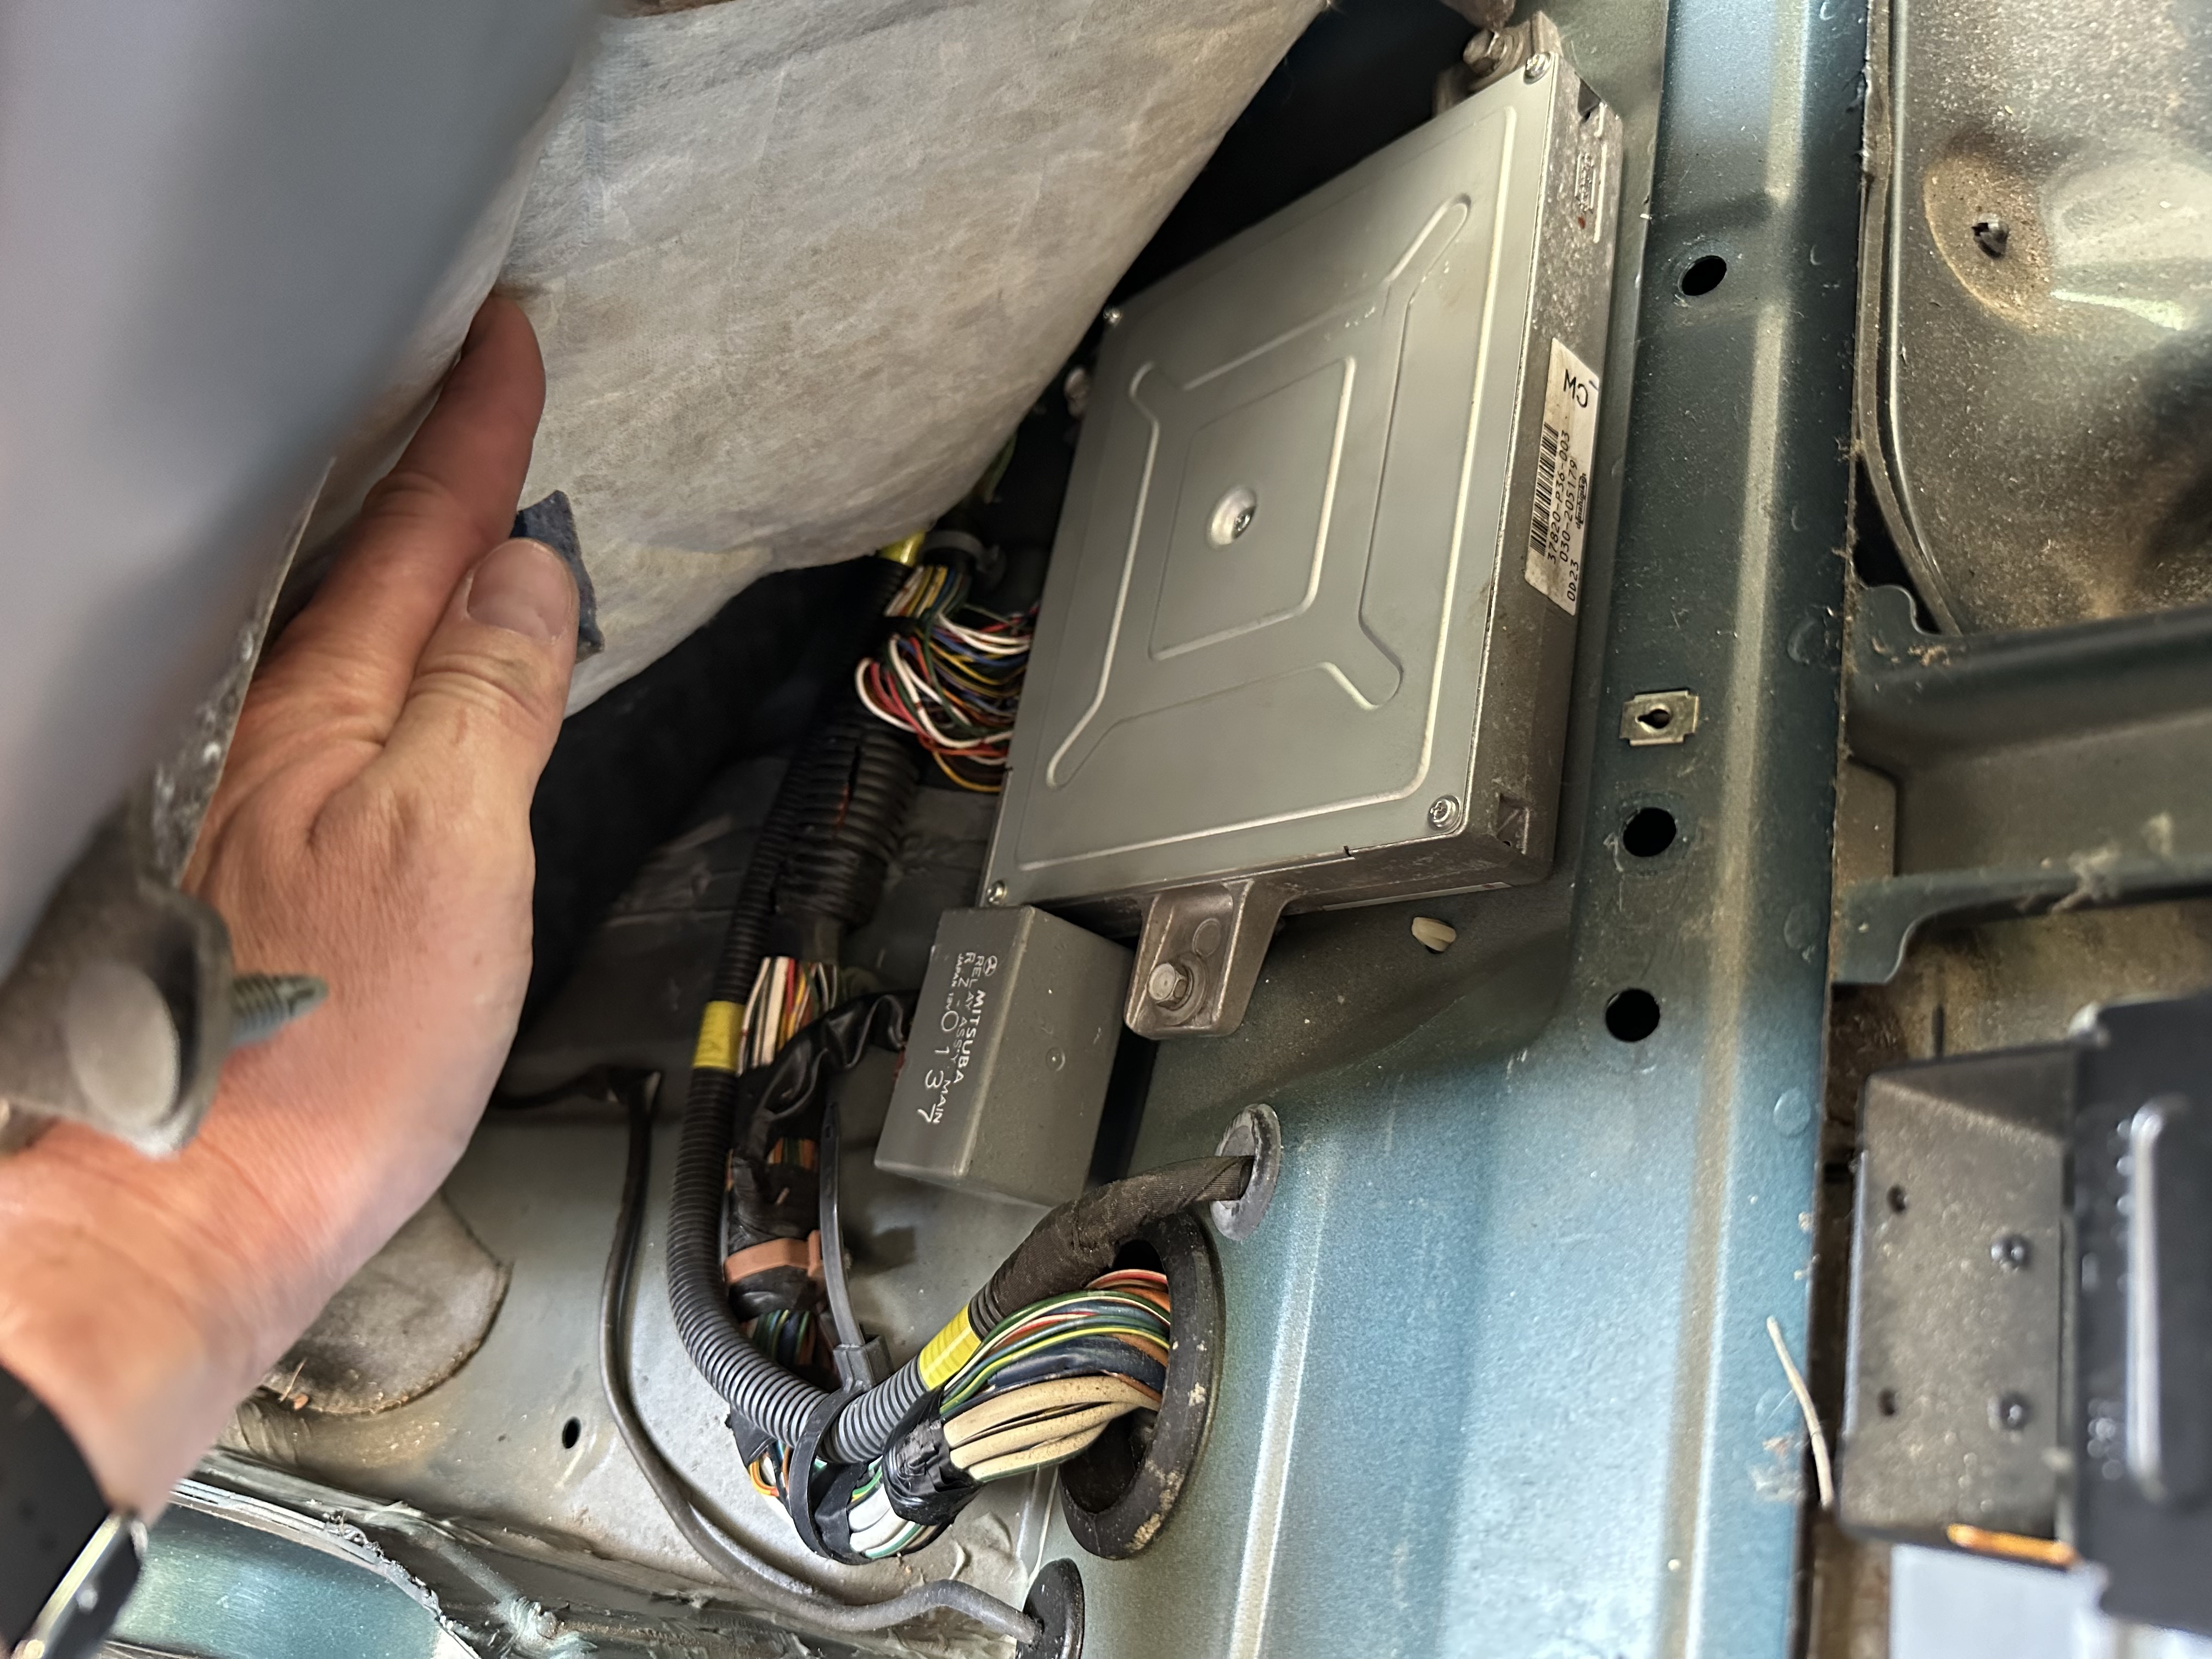
Step 5: Pull back the carpet to access the ECU and main relay
With the doc box out of the way, you can pull the carpet toward the front of the car to see the ECU and main relay. They’re both secured by 10mm bolts.
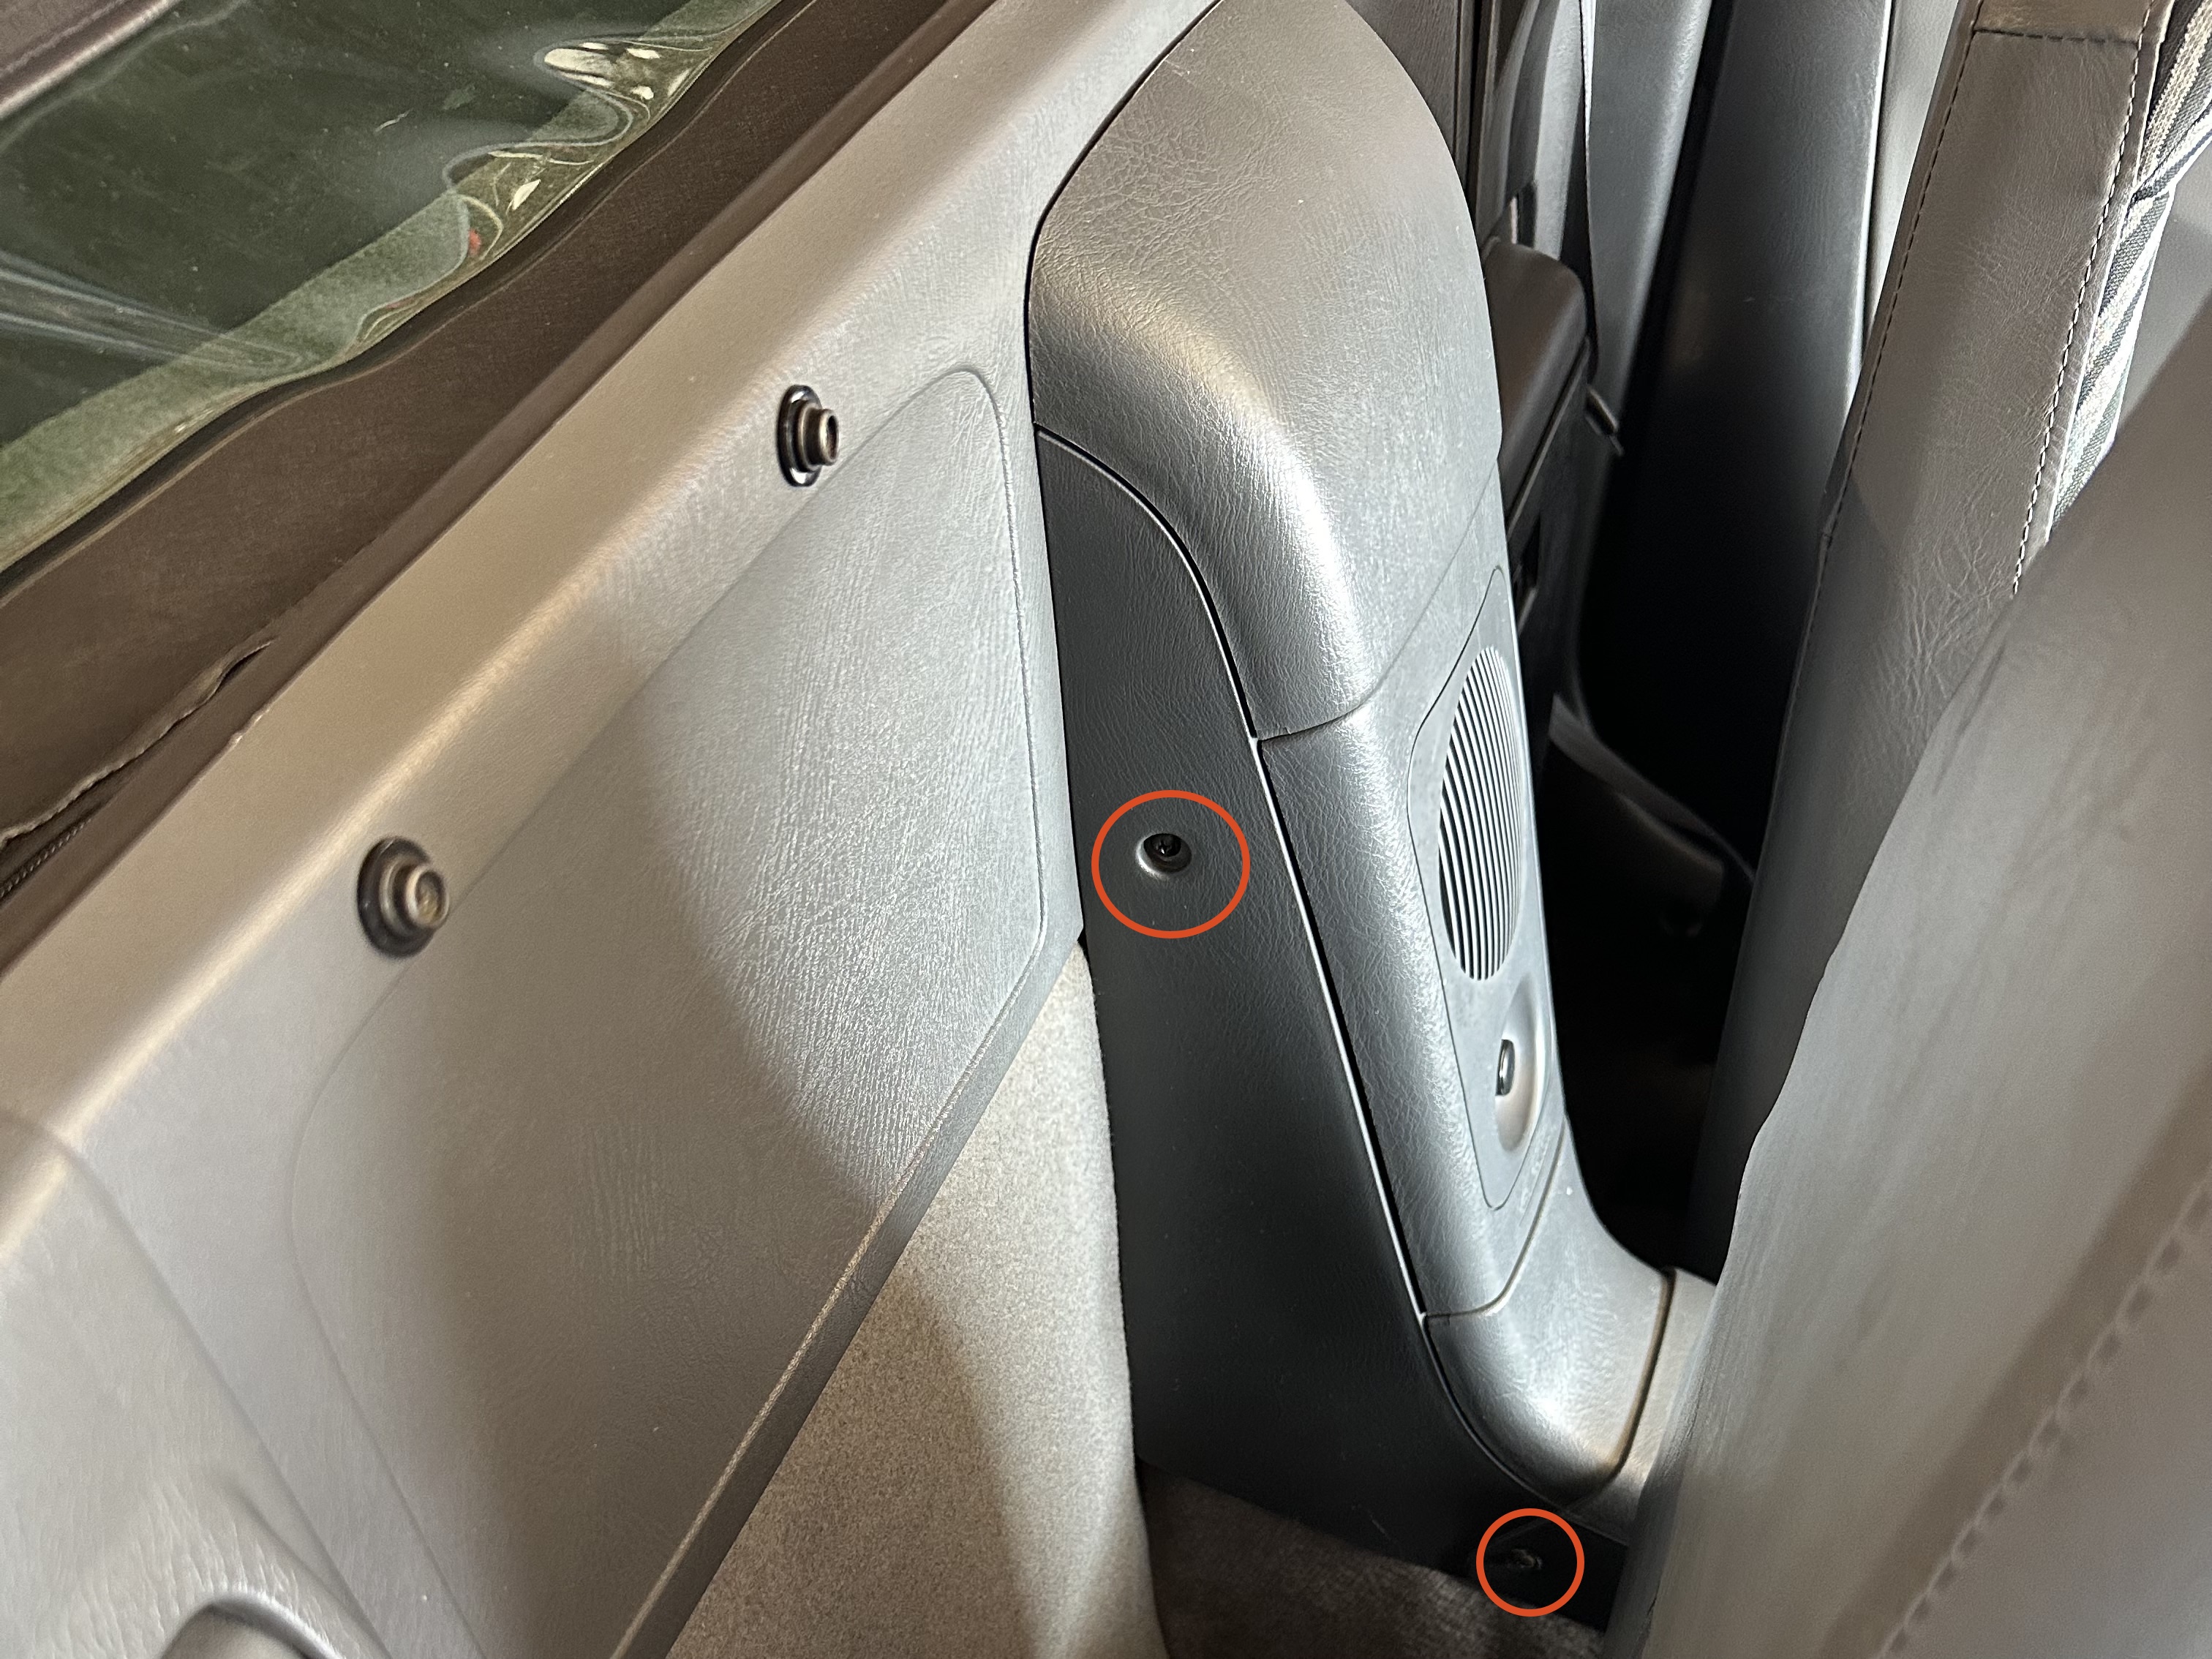
The carpet is secured by several plastic fasteners, but you only need to undo the upper right one. Maybe the lower right if you’re feeling frisky.
Conclusion
With the ECU and main relay exposed, you can now attempt to repair them, install a kill switch, or install heat shielding to prevent future issues.
Contact
Did you find this post helpful? Do you have suggestions for improvement? Send me an email or edit this post on GitHub.